Showing posts with label Jawbone Branch. Show all posts

Monday, March 4, 2024

SP Boxcar Recap for Modeling in 1950-1955 Era


SP 3203 arrives at Owenyo, pulling past the string of spotted boxcars in 1953.

While I've covered each of these classes in more detail relating to their era of construction or manufacture's review, I want to cover the SP Boxcar models that I'm planning to use on the Jawbone Branch as a whole in this post.

Balancing the Prototype Fleet Roster


I'm specifically looking at the fleet roster for 1950 and 1955 data points, as it will cover the biggest swing of the fleet from single-sheathed wood cars to new post-war all-steel cars.

Switching the fleet of SP Boxcars at Owenyo around 1953.

Fleet Breakdown         1940,   1950 & 1955    Number of Models in Jawbone Layout Fleet (March 2024)
  B-50-8/10/11        :      1673      171         1      = 1
  B-50-12:                        976          0         0      = 1 car (Last revenue -12 was rebuilt/retired Summer '49)
  B-50-13/14                  6858    5189     716      =  ~10+ cars
  B-50-15/16:                 4853    4745   4218      = 5 cars (I still have an unbuilt resin car, making 6 total)
  B-50-18/19:                 2750    2704   2659      = 2 cars (maybe 3rd car if I convert an old Athearn car)
  B-50-20/21/23:            5244    5220   3692      = 8 cars (with up to 4 more unassembled BLYM kits)
  B-50-25/26/27:                  x    8950    N/D      = 0 cars (would be nice to have a few, but no current plans)
  B-50-28/29/30/31/32/33:   x ~2000 ~10500    = 2 cars (I may still break down and pick up a T&NO car too)
                         Totals: 22354,~28979,30736    = ~ 28 cars (nearly one car per 1000 prototype average)

Note:
* I did not subtract out the T&NO boxcars of these classes. 
* B-50-24 is not shown because all of that class was in Express or Overnight service during the time I model, and wouldn't be likely to show up on the Jawbone. 
* Also missing from this list is the increasing numbers of 50ft single-door steel boxcars and rebuilt B-50-12A all-steel cars.
* Majority of B-50-29/30/31/32/33s built after 1950, so only show full numbers in the 1955 column.

Comments:
It seems, looking at the data, that the 1950 era was the crossover point when the SP was rapidly expanding the boxcar fleet with new classes, and before the majority of pre-war cars started being retired en-mass.  There were still a few of the older classes of B-50-1/2/3/4/5, & -6/9s in service after WWII, but I'm not bothering to show them here as it was only a few hundred cars left by these dates.  The remaining post-1950 new builds of B-50-29/33 series of about 8500 cars by 1953 filled out the fleet and allow the retiring older boxcars.

The 4 extra unbuilt BLYM '37 AAR cars will add extra cars to that group, which is already over represented, but lacking any B-50-25/26/27 class cars, I think it will balance out for now with an eye towards adjusting this in the future.  There also is the possibility that the B-50-20/21/23s would be more likely to show up on the Jawbone Branch given their age, and the new-postwar B-50-25/26/27s would be kept for more priority loadings.  While this theory is promptly shot down by the photos of the B-50-28/32s showing up at Owenyo by 1956-60 in noticeable numbers over the pre-war '37 AAR cars.

Class Details & Modeling Options


This is post is ending up being a super-index of all my previous SP Boxcar blog-posts.  So here's the quick notes on the classes listed in the roster above.

B-50-8/10/11 - Composite Boxcars (Pre-WWI) - (Kitbashed Accurail)


Pre-kitbashed B-50-10, SP 24864 with white bulk-load/dust leaks between the boards.

All of my Accurail B-50-8/10/11/13/14 class cars I'm planning to rebuild with new 3d printed ends, to make them look more accurate for the SP prototypes.  Hopefully, this project will move forward in 2024.


B-50-12 - USRA Boxcars (WWI "Standard") - (Tichy) 


SP 26948 from Tichy kit, assembled by IMRC.

The Tichy/IMRC USRA models for B-50-12s are pretty accurate for the SP's 1000 cars of this class, however the remaining 625 cars were all rebuilt in mid-1949 to All-steel B-50-12As for automobile parts service into the early 1950s, so I'm not planning to have any B-50-12As for now, and this model is more heavily weathered to model the end-of-life of these cars just before retirement in 1949.

The SP 26948 took a little damage to the plastic handbrake wheel, during the weathering process.  So I'll be replacing it with a brass one before the Jawbone Branch really gets into regular "high detail" operating sessions.

I'm also building a second B-50-12, but as one of the few cars that lasted into 1956 in MW service, specifically one of the two Supply Cars.  I'm renumbering it as SPMW 3931, which I've covered here before as SPMW 2676, and needed correction from a decal typo from a few years ago.

B-50-13/14 - Composite Boxcars (post-WWI) - (Kitbashed Accurail)


Pre-Kitbashed PE 2707, B-50-13 boxcar with MicroScale 87-911 decals.

All of my Accurail B-50-8/10/11/13/14 class cars I'm planning to rebuild with new 3d printed ends, to make them look more accurate for the SP prototypes.  Hopefully, this project will move forward in 2024.


B-50-15/16 - Composite Boxcars & Steel Rebuilds) - (Rapido & Resin)


SP 15203 represents the wooden B-50-15/16s with post-'46 lettering.

The Rapido models are certainly a starting point which allows them to be placed into service within a couple hours (assuming you want to put some touch ups and weathering on them), but the wooden sheathing boards are too wide, almost double the historic size.  I'm still considering options of how to 'fix' this on the two I have.

SP 15564 is a great B-50-15 steel-sheathed model.

For all the B-50-15/16s that were resheathed in steel, the Rapido model works very well.  The 15564 only needed a little light dusting of FCR to tone down the lettering and give a little depth to the paint job.  I also very lightly dusting on the lower carbody with a 'dust' mix through my airbrush, to replicate some photos I've seen of these cars at Mojave and years of Southwestern desert operation.

SP 37821, an Overnight-assigned B-50-16 steel resheath.

I decided I couldn't help myself.  I picked up one of the all-steel B-50-16s as a post-war "Overnight" scheme express boxcar.  Depending on exactly what era I want to claim I'm modeling, this car could be coming out of Overnight service and back to regular service in the 1949-1950 timeframe, and still retain the black scheme for a few trips.  I may decide at some point to patch the tare-date with some FCR, hinting that the car's not in Overnight service anymore.  I believe these cars should have the door steps and half-ladders applied from when they're in express l.c.l. service.


SP 32451 started as a Sunshine Resin kit. - Notice the correct narrow board-widths in the side sheathing.

Even though I started this resin kit a year before the Rapido cars arrived... I still need to do the last 5-10% to finish this car.  I guess if the over-sized spacing of the sheathing boards on the Rapido cars gets to me too much, I could always build a couple more Westerfield resin cars! - but that will wait until after I get the Jawbone up and running.

B-50-18/19 - Early '37 AAR All-Steel Boxcars (Square-Corner Post) - (RC/IMRC)


SP 38542, a B-50-19 from RC/IMRC

I'm planning to do a bit more weathering on my B-50-18/19s, this photo shows the problem with the photo-stacking and not having any weathering on the panel lines... they simply disappear.  So I'll probably do so weathering like the SP 102856 or 106272 (shown below) so these models photograph better.


B-50-20/21/23 - '37 AAR All-Steel Boxcars (Rounded W-Corner Posts) - (BLYM & RC/IMWX kits)

This group of cars is one of the largest groups that I should have in the post-WWII era and into the early 1950s, so I have quite a pile of old Branchline Yardmaster-series kits that I've built over the years, and several more that I've been working on recently.

SP 96311, a B-50-23 class boxcar, mostly decalled.

This was a repainted BLYM car from another foreign road that I decided would be more useful as an SP car.

Mostly finished, but still needs data decals on the right side...

Another car that I repainted from a less useful paint scheme, SP 84550 is a B-50-20 class car - which I still need to finish applying the class and data stencil decals below the herald.  Notice on these cars how far left the railroad name is placed.  A couple of my older models from the pre-Tony Thompson Vol.4 days has the decals starting to the right of the grab irons, which I believe is not correct.  I'm not sure if I'll get another full set of National Car Company decals to fix that or not... but it is starting to get annoying now that I have so many 'good' cars with the correct lettering.

Both SP 96311 and 84550 need some mechanical work and weathering to be put into regular service on the Jawbone Branch, which will probably wait until I have more of the physical layout built.


B-50-24/25/26/27 - Postwar All-Steel


Postwar B-50-26 builders photo from Tony Thompson's blog - Improving a freight car

All B-50-24s were assigned during my era to special Passenger Express and Overnight services, and would not be likely to show up on the Jawbone Branch in general freight service.

Tony Thompson covers an example of this in his blog post: Improving a freight car where he is kitbashing a B-50-26 from an IMWX kit. - Maybe if I can find a couple of these kits, I could do a few of these cars.

Links to Anthony Thompson's Related Blog Posts:
Improving a freight car - Modeling T&NO B-50-26 with IMWX Kitbash

Improving a freight car, Part 2 - Modeling T&NO B-50-26 with IMWX Kitbash

Improving a freight car, Part 3 - Modeling T&NO B-50-26 with IMWX Kitbash

One last Paul Lyons model - Finishing a B-50-27 Resin  Boxcar

Ted Culotta's Articles:

With nearly 9000 cars, these classes would be a great help to 'balance' my fleet out.  I don't have any models of B-50-24/25/26/27 classes, as they will either require finding other models that I don't have currently and then kitbashing to model or getting resin kits. 

Photos of Owenyo show the earlier B-50-20/21/23 class cars at Owenyo during my modeling era more than the -25/26/27 class cars, so my current fleet in-balance of larger numbers of pre-war steel boxcars is probably ok.

B-50-28/29/30/31/32 - Post-1950 All-Steel (Tangent's new B-50-28 models)

These are certainly my most recent modeling project entering early 2024.  Note the lettering changes between the Pullman-built B-50-28 (top) and the SP Sacramento-built B-50-31 (bottom).  The 1952 B-50-31 class also leads the SP fleet in dropping the bars above and below the reporting marks.  This change appears to be an interesting step towards the SP's 1953 general lettering change, but applied a year early!  The Pullman-built cars also have a wide spacing of the car numbers, which is unique to the class.

Tangent B-50-28 & -31 decaling

I've covered these in my blog post: Tangent B-50-28 & -31 Custom Decalled to Match Owenyo Prototypes in early Feb '24.  Final touches have been some light weathering and a pass with some dull-cote to seal everything in.

My Operating Plan


Tangent B-50-28 and -31 on my Jawbone Branch yard at Owenyo with photoshopped photo of Inyo Mountains behind.

The Jawbone certainly won't need 30 SP boxcars all out on the sceniced part of the layout at once.  The mix of these cars should make up a good slice of the SP fleet, and make it so the cars are rotated through.  Roughly 30 SP cars does give me the option to use the 5-track staging yard to full effect when combined with other foreign boxcars rotating in and out, so that no boxcar becomes too regularly seen on the branch.  The possible exception being that more photos from the 1955-1960 era shows that the SP/T&NO 7-foot door post-war cars (B-50-28-to-32-series) did start showing up fairly regularly.  So maybe the two new Tangent cars will be recycled through staging faster than the other cars to simulate the new car type showing up more regularly for that era, as the B-50-8/10/11/12s were basically all gone by 1950, and even the B-50-15/16s seemed rare in the 1955+ photos of Owenyo, while they did last on the system well into the 1960s as steel-sheathed rebuilds.

My fleet still has a skew towards the single-sheath boxcars of the B-50-13/14 series and lack of any good plastic models for B-50-25/26/27s shows a major hole for modeling circa 1950.  Maybe I'll find a couple IMWX or IMRC 6-panel 10ft cars to work with sometime, as the basic roster numbers would suggest that I should have somewhere around 9 cars from the -25/26/27 series, but I'm probably not going to get 9 new cars overnight.

In Closing


One of the operating schemes that I'm pondering doing is setting up the staging yard to reflect the way the equipment changed between 1940/46 and 1950 and 1954.  Showing that not only will the engines working the trains change, but that I could have the balance of freight cars shift from earlier eras through a transition, then to the later era over the course of 3-5 days of consists being switched on the layout.

The extra Accurail B-50-13/14s in my fleet will allow me to more easily make 1940-1945 era operations on the Jawbone Branch and model the 'mixed' Owenyo Local.  Then spread the remaining cars out through the sessions as the era moves forward.

SP 3203 arrives at Owenyo, pulling past the string of spotted boxcars in 1953.

I figure the operations could easily take an hour to make one lap out of staging to the layout... so to run 5-6 complete trains, without even doing live re-staging, which is possible, that will give a 'full day' of play value in the rather simple layout.

Jason Hill


Related Articles:


Modeling B-50-Series Boxcars (Part 3) - Plastic Options for B-50-8, -10, & -11 class cars

Plastic Options for B-50-12, B-50-13, B-50-14 class cars - Accurail & Tichy models

Modeling B-50-12 SP 29648 from Tichy USRA Boxcar (Part 1)

Ted Culotta's Articles:

Wednesday, November 1, 2023

SP Jawbone Branch (Part 39) - A Ferro-Equestrian Archaeology Field Trip

A friend of mine said a number of years ago that he was a ferro-equestrian archaeologist.  That is a study of iron horse historical places and remains.  This post is another of my small ventures to one of the places where the ferro-equestrians once roamed.

Looking east to the mountains which will be my backdrop for Owenyo

So on the return from the Southern Pacific Historical & Technical Society 2023 Convention in Bakersfield, I decided to stop over in Lone Pine and then drive up the east side, stopping at Owenyo to do some in-person research of what remains of the buildings.  This would give me the chance to make drawings of the remains to build the models for my Jawbone Branch layout.

Edit 2023-11-02
Blueprint of Owenyo - rick olson 01_owenyo blueprint_sml owensvalleyhistory,com

A recent find on the owensvalleyhistory.com website, helps see the locations of everything.  I'm happy I found this Nov 2, 2023, as I'll be able to help scale out the size of the buildings and some of the placement.  The original date is from Dec 31, 1923 and the revision date for the leasing of three structures is July 19, 1940.  The 1923/1940 dates explain why I don't see the water tank or the transfer ramp between the two gauges in the lower right corner.  Also interesting is the "To San Francisco to the left and Hazen to the right, so it must be SG to SF left and NG to Hazen right - perhaps because they're thinking to extend the standard gauge?

Transfer Trestle


Owenyo Trestle - SG side - unknown calander photo - Ronald Grau collection

I spotted the abutment remains from the road and pulled off.  Walking over, I found that the NG and SG around the area were actually on a bit of a fill.  Even the trestle approach grade was rather in a pit as well, probably from the old days when they dug down to get some more solid ground to put the trestle bents on.

Sadly, not much left of the transfer trestle other than these footings, looking northward.

I took some time getting out and measuring the dimensions of the foundations.  This should be the last piece of information, which should allow me to build an accurate model of the trestle for my layout.

The footings looking south, into the sun.

The SG track's pit has collapsed somewhat, as the transition from the grade to the trestle over the SG track has sluffed into the pit.  Although there must be some level of washing out the lower parts of the pit, because on a couple of the concrete footings for the trestle, even the connecting concrete is visible.  I think this means that the floor is about a foot lower than it historically was.

Owenyo Transfer Trestle - owensvalleyhistory,com - sp_narrow_g37a_sml

Looking at the above photo, shows that at the time it was taken, the wood bases of the legs are even with the ground, which means that concrete footings are completely buried.  The concrete footing bases seems to then be flush with the ground in the pit.  I'll be analyzing this more and covering the results in future posts.

Tell-Tail 


Tell-Tail from 1954 - cropped - unknown calendar photo - Ronald Grau collection

With any vertical or horizontal obstruction the railroad had to put tell-tails to warn anyone riding on top of the cars that there was a problem if they stayed standing. - To my eye, I think this tell-tail isn't low enough to provide proper warning, but the ETT warns specifically about not shoving boxcars, etc onto this track.

The remains of the foundation for the tell-tails.

All that's left today is three and a half concrete blocks with rusting torched off pipes for the tell-tail.

Old Owenyo Road


60-10-Goods-Transfer-Platform-_sg-on-far-side__-Owenyo-V_2 - PacificNG

The old turn-off from the road into the area behind the Narrow Gauge still has remains of the old 'oiled dirt', which is still sticking together even after 65+ years in the desert.  

Owenyo transfer decks with road crossing looking north - owensvalleyhistory,com - ebay35_owenyo_sml - (Lightened)

As I pull up and park, the footings of the water tank are visible immediately off to my right, and a set of foundations to my left catch my eye.

Bulk-Transfer Conveyor


OWRN boxcar Owenyo Perlite Transfer from SPNG, SPMW water cars, Sept 19, 1950 - owensvalleyhistory,com - mark_van_klaveren04_sml

The transfer facilities at Owenyo include this bulk-conveyor at the south end of the main area.

Remains of the conveyor as it was dismantled in 1960. - Rich McCutchan owensvalleyhistory,com - daton01_t

Sadly, the end came for the conveyor in this 1960 view of the whole facility being destroyed.

Owenyo Conveyor Foundation - NW Side

Now, all of the foundations that remains of the bulk-transfer conveyor building.  Thankfully these cast concrete bits are still there!  I spent some time making drawings of this to base my model on.

Water Tank


Water Tank - Owenyo station with tank and 5501 RSD-5 - Andrew Brandon collection - Cropped

Turning towards the water tank and heading that way, to my surprise I find several other things in the area.  

Tank foundation remains at Owenyo

A couple of plugged concrete slabs, with what looks like remains of underground piping - perhaps part of the pump house-water tank or connection to the long gone SPMW water tank cars. 

Water Pump House


Owenyo SG water Tank - 1960 - Alden Armstrong - Cropped - 

The foundations of the pump house are there as well.  Thankfully, I think I can work out the base for my model now.  Looking in the foreground, left-front of the pump house tower shows the cistern that is still there today.

Water Pump House foundation remains

Also there is a large cistern which is half covered by a mound of dirt... almost in the road, where it crossed the yard.  I'm not sure if that was there 65 years ago, or if it was more recent.  There's an open cover about 12" in diameter, and the sounds of hollow space below.  I stayed clear of it, as I didn't want to find myself down a well or the like.

Company Houses?


1944 Fairchild Aerial photo - cropped

After the pump house, I decided to walk up past the company buildings and see if I could locate anything of their footings... however with very large bushes overgrowing the whole area, I decided not to look very hard.

Oil Pump House


Fuel Pump House & Tanks - Cropped Owenyo Hotel decom - Rich McCutchan - owensvalleyhistory - c_n_c40_owenyo_1960_859_sml

Next up, as I was walking to the north, I decided to continue and see if I could locate any of the old engine spot remains, and maybe get more information on the oil tanks and pump house located on the north curve of the wye.

Engine Spot remains.

I was able to find a very thick slab of oil-dirt or asphalt covering between the long-gone rails, but still covering the ties, which is where the steam engines sat 100 years ago, dripping steam oil and grease for nearly 40 years.

Engine Spot - end of track crossed-ties?

It seems that at some point the SP gave up on the wye, probably after the end of steam on the branch, I'm guessing around 1956-1960.

Remains of the Oil Pump House - Not much left of the tank structures.

There were a couple of small foundations and other patches of asphalt/oiled-dirt, but not anything that I could really recognize as anything of what the photos once showed there.

In Closing & The Long Trip Back


After about 2 hours looking around, I decided it was time to get going.  I quickly set up my tripod and shot a series of photos of the White Mountain range to the east for when I go to make the backdrop.  Then I hopped in the car to get going.  In hind-sight, I should have returned down to CA-136, and back to US 395 at Lone Pine, but feeling adventurous I continued north. 

Who says there's no water in the desert? Manzanar Road 2023-10-30 closed!

The Manzanar Road was closed due to flooding, so it forced me to continue on for another 5-6 miles of worse dirt road and old railroad right-of-way. Unfortunately, the heavy winter of 2022-2023 which kept snow on the ground for over 90 days at our house in Nevada, also did a number on these back country trails as well.

I would not recommend trying to drive the north-side access drive in anything other than a Jeep or 4-wheel pickup truck (which I happened to leave in NV!).  I did get through it, however with some new pin-striping and nearly getting stuck in soft sand about 5 times.  At approximately 4-5 places my vehicle found high rocks or badly worn tire tracks which could have high-centered lesser cars.  At one point the road was not passable to my vehicle, due to a fast rising trail of nearly 8", which would laterally high-center me.  This  requiring me to back out about 400 ft, turn around and then back track another 1/4-1/2 mile, then break trail across to the other road, about 50 yards away.  

Once I was able to get onto good road again at Citrus Rd, the rest of the drive back west to US 395 at Independence was without incident.

Jason Hill

Related Articles:


SP Jawbone Branch (Part 26) - Engine Spot & Water Track Detailing

Jawbone Branch Index Page - Main index for my Jawbone Branch (only) blog page.

Thursday, September 22, 2022

Modeling SP 3266 (Part 2) - More History & Installing Clam-Shell Smoke Stack


Photo of the upper boiler and smoke deflector on SP 3266 which I'm installing in this blog post.

For this post, I'm going to branch out in my skill set, build one of the brass smoke deflector sets, and install it on this model.

An example of the smoke deflector on Sunset T&NO 910, 2-10-2 Deck, obviously a different set of castings.

To show a completed one, I grabbed my Sunset F-5 class Deck (T&NO 910) which has a smoke deflector as my reference for assembling the new brass parts on the SP 3266.

Prototype History


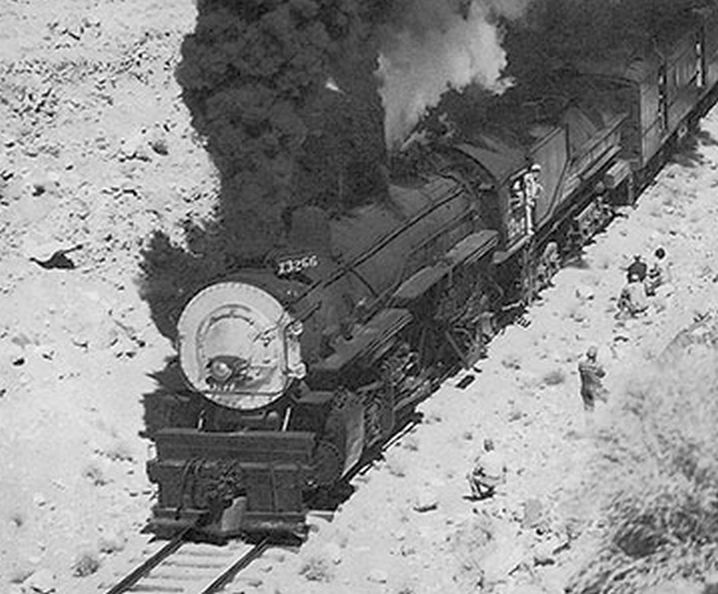
The Jawbone Branch used primarily standard SP C-8/9/10 class 2-8-0s and after about 1949 smaller Mk-2/4 class engines became assigned and specific engine numbers listed in the ETT and Special Instructions Tonnage Ratings. 

SP 3266 near Olancha with excursion in 1952 - Phil Serpico - owensvalleyhistory,com - southern_pacific012_t - Cropped

For a period of time SP 3266 was also listed in the Special Instructions and there's photos of it operating the May,30, 1952 passenger excursion to Owenyo.  On October 28, 1952 the engine was vacated at Bakersfield, and sold for scrap on December 5, 1952 at Los Angeles.  However, on my Jawbone Branch she will run on once I get this model in service!

On With the Smoke Deflector!


Removing Straight Stack


Stack barrel removed with resistance soldering unit.

I used a resistance soldering unit to heat and remove the upper barrel section of the stack to start.  At this point the stack base flange is still soldered to the smokebox barrel.

SP 3266 smokebox top with stack flange removed.

The stack base flange was mostly held by about 1/4 of the diameter soldered at the front.  Heating this area with the resistance soldering probe tweezers worked really well to loosen the flange piece and remove it.

Fitting the New Stack


Mockup assembly of the new smoke deflector pieces.

The smoke deflector is cast as three pieces.  (Spoiler) I ended up cutting off the operating mechanism and attaching it separately to clear the train indicator boxes in the last step.

New stack base soldered in place.

I worked my way around the stack base with the resistance probes heating the stack and smoke box right around the base.  Using the flux liquid and I was able to flow some rosin-core solder into the joint.  I also double checked at this point that this smaller stack centered on the boiler top, and also lengthwise, in line with the cylinder supply pipes and train indicators.

Pencil marks for drilling 0.025" holes in the smokebox shell for the pins on the feet of the front deflector.

The front deflector casting has two legs which rest on the top of the smokebox, each foot of the leg has a pin which I want to mount into a hole, to form a good mechanical joint to the boiler shell.  I used a pencil to draw longitudinal lines at the proper spacing for the brace legs.  The edge of the cleaned brass is where the holes need to be drilled.  I would have liked to clean the smokebox shell farther back under the train indicators, but wasn't able to with the fiberglass brush.  My Dremal mounted the 0.025" drill bit and was easily able to drill through the shell.

Installing the Front Deflector


Top-view of the forward smoke deflector installed.

The front deflector is soldered in place by the two mounts that fit against the stack.  Then I soldered the two pins on the front legs into the holes drilled in the smokebox shell.

Front smoke deflector, all soldered in place.

Train indicators still showing the old engine number, 3244. - Those will eventually be replaced when I get the redecalling and detailing done on the engine.  I used some solder-wick braid to pull excess solder off the support legs.

Installing the Rear Deflector


Rear stack deflector installed.

The rear stack needed a hole drilled in the band of bolts at the rear edge of the smokebox barrel.

View from the other side showing the rear deflector.

  The solder joint at the back edge of the stack are pretty ugly in this photo, but a bit of solder-wick soak up the extra and cleans it up.

View from the front of the deflectors.

I cut off the deflector operating piston mechanism piece as it was fouling the left train indicator box.

Installing the Operating Mechanism


The deflector actuating mechanism installed on the left side of the stack.

I was able to get the piston piece to fit in again after trimming the bottom mounting pin.  A quick hit with the resistance soldering iron fixed it in place.

Smoke stack deflector installed in the open position.

Close-up of the pretty well finished smoke deflector installed.

Sanding Rods?


Stack installed on Balboa Mk-5/6 class model.

Stack in place on the engine, needing to work on the cab decals.  Note: the flaking of the paint on the eccentric radius rod.

The radius rod after light sanding with moderate grit sanding pad.

After touching up the black paint on the model and painting the drivers, the radius rods started flaking off the paint almost immediately.  To give the surface more "tooth" for the paint to stick to, I sanded it with a moderate sanding pad.  This is a photo after that is done.  When I go back and touch up the rod's steel color this should all be wrapped up.

In Closing


Decalling the cab side with San Juan Decals lettering gray SP steam set.

So, since this photo, I've started putting the cab decals on, starting with the road number.  An Athearn-Genesis 120-C-6 tender is ready to go and decalled to match.  At this point, I've not completed the drilling of the hole in the front of the tender frame to accept the Balboa drawbar with screw.  The motor currently is disconnected from the tender drawbar due to damage to the rear engine frame, which I'll be showing how I fixed it in the next part.

Left side of SP 3266 at present time.

Given how easily I was able to drill through the smokebox barrel, I might actually decide to drill and mount eye-bolts for bell and whistle cords.  I'm planning to fit the engine for crew figures.  The train indicators will have a strip of material put in place to make the decalling easier.  The train indicators will probably be set up as "X3266" as the 3266 would be running as an extra on the Jawbone Branch basically exclusively.  

Better focused photo of the upper boiler and smoke deflector on SP 3266.

There's still some brush marks on the smokebox from some previous owner, so I might do some tight spot sanding/fiberglass brush work to smooth that out before doing my touch-up work from installing the stack deflectors.

Right side of SP 3266 at present time.

Eventually, after all the other work, I'll be weathering the engine to some extent to match the first 3266 that I worked on a couple years ago.

Jason Hill

Related Articles:


Modeling SP 3266 (Part 1) - History & Fixing Frame Damage - History of Mk-6, SP 3266 & resoldering rear frame failed solder joints.