Showing posts with label Decals. Show all posts

Saturday, October 14, 2023

Routing & Grading Cards with OwlMtModels 1220 Decals

Over the years, I've used blank snippings of paper glued to the car sides to simulate the routing cards on my models for over 20 years.  In recent years, modern modeling takes advantage of digital depth of field stacking and focusing which makes it possible to even read the smallest lettering on models.  In recent months, I've started to notice my older models with blank routing cards are starting to draw unwanted attention.

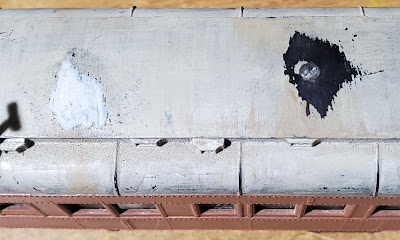
NC&StL 15337 Accurail kitbash with OMM 1220 routing and grading cards matching photo below.

However, for the prototype modeler and the operating modeler there's one detailing aspect which I've that can be improved with modern technology.  Why not also be able to read what is on the routing and grading cards on the model?

For more info on this NC&StL car see links below:
NC&StL 15337 (Part 3) - Wrapping Up & Weathering - Other articles on this Accurail 36ft Fowler kitbash are linked at the end of Part 3 article.
A New Chalk Mark Method - Using Gel-Pens for chalk marks!

NC&StL 15337 - Fowler -TRRA photo, East St Louis, July 1948, Illinois, Joe Collias coll, Bobs Photo - Ted Culotta collection

The prototype photo of NC15337 shows two or three cards.  The ones on the left are probably routing cards, and the one on the right is probably a grading card.  It's another level of modeling enjoyment to be able to match prototype photos even closer now.  Let's look closer at how this came to be.

OwlMtModels' Decal Cards


The OwlMtModels #1220 decal set includes 144 prototypically based cards, two groups are in white, a third group in light green/blue, and the fourth in a manila/beige color.  Thanks to Anthony Thompson and his prototype paperwork collecting contributors for making posts on his blogs over the years documenting the vast historical cards used by various railroads.  I'm also linking directly to Tony's blogs in this post for the prototype examples.

OwlMtModels' new #1220 Routing & Grading Cards decal sheet.

Earlier this summer I asked Todd Osterburg to see what we could do with PDC's fine line decals.  He was nice enough to draw the artwork.  The decals are produced by PDC in Canada and sold through OwlMtModels website for $2.00/sheet.

Railroad print shops would use various basic pastel colors which they had on hand.  Special colors such as yellow or red were reserved for home-routing/shop cards or bad-orders.  If there's interest, OwlMtModels may offer other versions, but this is a starting point for modelers.

Prototype Cards


A clerk cards a SSW boxcar with his hammer-stapler - Linked photo from Anthony Thompson's Routing Cards #11 blog.

Cards would be hammer-stapled anywhere along the lower wooden parts of wooden cars.  Steel cars had 'tack boards' and 'card boards' mounted to the car sides.  Flatcars and tank cars with wooden running boards could have the cards stapled directly into the deck or running boards.

Routing Card typical from Anthony Thompson's blog

The SP used a number system to send the cars around the system.  There were also basics for WB/EB and intcherchange cars seem to have cards for which railroad the car was going to go to.  For example D&RGW or UP at Ogden.

Routing Card Number index for SP - Anthony Thompson's blog Part 10 where other examples are shown.

There were many systems of cards used around the country.  It seems that different divisions would also have their own numbering series.

Another excerpt from Anthony Thompson's Routing Cards #11 blog

Much of the smaller lettering is not possible to print even with modern technology, so the decals are limited to the larger lettering.

Grading Cards


The grading cards: A, B, C, D (or X, depending on the railroad doing the grading) were easy ways to sort out which cars would be available for loading.  The traffic departments would actually keep a large sheet of paper, similar to the operating department's Train Sheet, to keep track of all the cars on the division going to customers and expecting to be becoming available in the coming days.  They would also keep track of how many available boxcars (XM) would be available in each grading category.  Shippers would then be putting their orders in for their loads which would require at least a certain grade of car.

Grading Card examples linked over from Tony Thompson's blog.

Anthony Thompson's blog, Route cards, Part 19: grading freight cars, covers more details of car grading.  Operationally, I'll probably be doing more on car grading for my Jawbone Branch at some point, but for now back to the car carding.  Tony has some additional grading card variations in Route cards, Part 23: varieties of grading cards post, including the octagon-shaped cards.

The railroads would grade cars according to several subjective standards by the carmen looking them over between loadings.  Cars could be improved to some extent by sending the cars over to the RIP track and spending some time cleaning up the interiors by fixing exposed nail heads, damaged boards, etc.  Some cars would be carded to be "CLEAN OUT" which would involve removing old materials and debris from the car's interior.  Normally, the customer that unloaded the car was supposed to clean out the car but that didn't always happen.  The railroads often had a whole track in the typical yard for cars needing "Clean out".  Cars could easily spend 8+ hours in these tracks as you wouldn't want to be inside cars sweeping them out if more cars were being shoved into the track.

Accurail PFE R-40-27 with a routing, Time, and CLEANED card, typical for perishable assignments.

Reefers obviously would need more specialized care and cleaning, thus it was concentrated in a few repair shops.  PFE had three locations, Portabello in Idaho, Colton and Roseville in California.  SFRD concentrated their efforts at San Bernardino and Bakersfield's facilities.  These repairs and cleanings could include removing spoiled perishables, cleaning the bunker drains, repairing or replacing the linings of the car if damaged or contaminated, etc.

Tank cars often needed to be cleaned if they were being reassigned to another loading.  Some loads required regular steam cleanings, other linings required NOT to be steam cleaned.

Flatcars were pretty simple, their wooden deck edges were easy targets for the clerks' hammers.

In Closing


At a little over one cent per card, these decals are quite affordable, and one sheet can do dozens of cars.

Right (not photographed) side of Accurail kitbash, which is finished in 'typical' fashion with chalk marks and routing cards.

I've started applying the cards to cars in my fleet, so you might start noticing them in future blog posts.

Jason Hill


Related Articles:


Some specific blog posts worth a look.

Route cards, Part 11 — examples

Route cards, Part 19: grading freight cars

Route cards, Part 20: more grading cards

Route cards, Part 23: varieties of grading cards

NC&StL 15337 (Part 3) - Wrapping Up & Weathering - Other articles on this Accurail 36ft Fowler kitbash are linked at the end of Part 3 article.

A New Chalk Mark Method - Using Gel-Pens for chalk marks!

Sunday, October 1, 2023

Upgrading SPMW Pullman Bunk Cars (Part 1) - New Paint & OwlMtModels Decals

It's been at least 20 years since I last worked on my Rivarossi SPMW Pullman cars, and I think it's about time to do some upgrades!  While not as perfectly accurate as the Walthers and Branchline plastic-tooled passenger cars of the early 2000s,  So, they can be had at swap meets and on-line websites second hand.

Starting Point & History


Time to upgrade my SPMW Pullman Bunk Cars!

One nice advantage of using the old Rivarossi cars is that they're not to expensive and they also have the non-air conditioned roofs!  The lack of A/C makes them perfect for modeling these bottom-grade tourist cars, several hundred of the older "Tourist" Pullmans were sold to the SP during 1948 in the lead up to the disposition of the 9000 Pullman cars to the railroads at the end of the year.  This makes since as the court's anti-trust order came in 1945, the railroads and Pullman had been negotiating exactly which cars would be sold off, scrapped, or would be bought for continued service after the Pullman company owned pool was broken up in December 1948.

Several other large batches of Pullman cars which the SP bought in 1948 were retired by the SP in 1953 as they wore out and weren't needed with the LW cars the SP bought in 1949 and 1950 for the Cascade and Sunset Limited.  Then another large group of HW Pullmans were retired from revenue service in 1955-56 after the discontinuance of all the SP's 3rd rank passenger trains at the end of 1954.  Most of SP's premier HW Pullmans didn't last past 1956 in regular service.  The remaining SP HW Pullmans were held, leased, in the new railroad owned Pullman Pool until the 1962-1966 time frame when the US Government finally cut off the requirement to keep a national pool of passenger cars for national emergency military movements.

SPMW System Outfit Consist, circa 1960 Lone Pine  - owensvalleyhistory,com - ebay47_lone pine_sml

While I'm keeping my modeling in the pre-1958 era, this consist certainly could have existed in Freight Car Red scheme before 1958.  So I'm going to do some upgrades to my old Rivarossi Pullman SPMW cars.

My original starting point for these three models were my 25-year-old models using MicroScale decals and minimal research materials, resulting in cars that were only retired in 1954-56.

One of my original SPMW Pullmans from the early 2000s. - Jan 2020 at LMRC, Jason Hill photo.
 
In the last 15 years SPH&TS has printed their series of Passenger Car book, including one dedicated to the SP's Pullman cars, which covers much of the prototype information.  Plus Pulllman Panorama has more information on Pullman series, arrangements, plan numbers, basic dispositions, etc.  And now in 2023, Ken Harrison has released his wonderful SPMW book with many photos.

Unfortunately, my cutoff has been circa 1953 for my fleet since I settled on steam-diesel transition era modeling and even with the Jawbone Branch's cutoff date now being pushed back towards 1954/55, these cars are really pushing the limits of my 'comfort' bracket for modeling.  Also one of the numbers I chose 25+ years ago should have been a 16-Section Tourist Sleeper, so basically totally the wrong basic model.

Repainting


These issues have finally pushed me to redo my SPMW Pullman cars.  

SPMW 4807 before decalling, left side.

The cars that became the 4807 was repainted using a custom mix of StarBrand paint from P-B-L of SP Freight Car Red and I was out of the Light Freight Car Red, so I mixed in some Depot Buff to make the paint look like it's been sun-faded a bit.

SPMW 4807 before decalling, right side.

The car was easy to repaint.  I removed the interiors and roof/window section.  A piece of scrap sheet styrene was used inside the windows to keep paint from wondering around the already painted interior of the cars.

SPMW 4812 before decalling, left side.

The 4812 used a nearly straight mix of StarBrand SP FCR, which is actually quite a bit more saturated.  So I'll just say that this car's been more recently repainted to full FCR colors.

SPMW 4812 before decalling, right side.

The I had already painted the roofs aluminum/silver a number of years ago, so no need to do that again.  I did swap a couple of the roofs around again, to make the two FCR cars come out with aluminum roofs and the car below got the only non-aluminum roof.

They're Green?!


The third car received some special treatment, when I went back through Ken Harrison's SPMW book again, I found several photos of freshly retired Pullman Tourist Car.  These cars didn't receive FCR paint immediately, but instead continued in Pullman Green with patching for SPMW within a couple of months of being sold to the SP in 1948.

Left side SPMW 4866 before decalling.

Because I do generally consider 1946/1948 as the early edge of my modeling, I decided to repaint one of my Pullmans from FCR into this 'original' scheme when these cars came to the SP.  Specifically, I chose the 4866, which was converted in Feb'48 and was still in patched green scheme later that year when photographed.  Ken has a photo of this car in the book, which mostly matches up with the old Rivarossi models I'm using.  The car has single aisle windows, but one minor change is it has four full size windows on the A-end lounge room.  I don't really feel like rebuilding the windows, as I'd have to change the prism glass in the roof.

Right side SPMW 4866 before decalling.

It is hard to tell in the prototype photo if the letterboard was patched with SP Dark Olive Green or maybe black.  I pre-painted the black patch on the side and also the letterboard between the panel joints.  Then masked the lower center panel per the photograph for the reporting marks.  The old Pullman Green was custom mixed from StarBrand SP DOG, with a bit of black to get towards my 'standard' Pullman shade (less "warm" red-brown) and then Depot Buff was added to bleach and pre-weather the green color.  As this green coat is actually going directly over weathered FCR, it creates an interesting reverse-modeled appearance.  The letterboard was then lightly oversprayed with the 'Pullman Green' custom mix, which let much of the pre-shading black come through.  This effect is commonly used by aircraft and armor modelers to create special effects around panels and panel lines.  In this case to creating a color difference around the center letterboard panel, which would have been patched out.

Decalling!


So now the question is who's decals to use?  I've seen MicroScale's offerings, but they really don't give good return for the space of decal paper used.  Too much space is spent on very rare and specialized MW equipment that I don't even plan to own anytime soon, but not enough of the common car types.  I found an answer when Todd Allen Osterburg told me that he was developing several new SPMW decal set, which are now being offered by OwlMtModels and printed by Bill at PDC in Canada.  

SPMW Pullman Conversions - OMM #1224W

The OwlMtModels 1224W & WS set is available at OwlMtModels' new store-front.  Two versions are available; one with solid lettering (W), and the other with 'stencil' bars remaining (WS).  The set is designed to decal up to three cars from the common number series of SPMW's Pullman bunk cars.  Included are "Occupied Outfit Cars" signs which can be fabricated to hang on the end-grabirons and on the switch stands of the track the cars are left on, effectively 'blue-flagging' the cars so they aren't coupled to.  Often these standing outfits when set up for 'camp' mode would not be moveible without some amount of work to stow and clear away the various stairs, ladders, water, electrical, etc connections to the ground. 

Examples of OMM's stencil reporting marks, and warning signage from OMM #1225WS set on B-50-2 Ready Boxcar.

OwlMtModels is also offering decal set #1225 SPMW Boxcars, which covers many assignments for B-50-8/10/11/12/13/14/15/16 classes. and #1218 for SPMW Supply Boxcars.

SPMW 4807


SPMW 4807 Decalled Left Side

The 4807 was lettered with 'typical' arrangement for reporting mark placement, and I chose to add the Danger/Peligro warnings, which tended to move almost anywhere along the lower car side.  The left side still needs a "LT WT" stencil applied to the left of the weight 152000 stencil. - Just noticed that I missed that when I took these photos.

SPMW 4807 Decalled Right Side

The SPMW 4807 still has some kludged roof vents, which I'll probably be removing.  The 4807 actually did have a T-smokejack which was closer to the center of the car, in the corner of the main 12-section part of the car.

Vents clipped off, sanded, and 'patched' with light gray GellyRoll gel-pen.

I went ahead and removed the extra centerline roof vents.  I used a sanding pad to roughly clean off the scars in the roof, but that of course exposed black colored original roof. 

I'll be doing some tricks to hide that.  I decided to try using the same Gel-Pens that I used for chalk marks to roughly get the same color on the roof, then I'll do some more roof weathering blending.  Might be interesting to draw in more of the roof panel lines on the un-detailed roofs.

SPMW 4812


SPMW 4812 Decalled Left Side

The SPMW 4812 is more 'typical' of the most retired Pullmans in Ken's book before the late 1958s when propane tanks for cooking and heating were cut into the side of the car.  Cars with these modifications are certainly interest, requiring ladder/stairs and doors, etc.  Many of the cars in the book also show swamp coolers and even fuel-oil tanks installed in vestibules with the doors sometimes removed.

SPMW 4812 Decalled Right Side

But these cars are pretty much done now.  I'll probably do a bit of weathering to slightly knock down the brightness of the white decals.

SPMW 4866 - "The Green One"


Left side of finished SPMW 4866 with patched reporting marks.

One interesting small detail is that the prototype 4866 had a non-standard stenciling applied to the car in the prototype photograph.  It had periods on the "M.W." which all other cars I've seen photos of didn't have.  I used the 0.5mm White Gel-Pen that I covered using for Chalk Marks last month's blog.

Right side of finished SPMW 4866 with patched reporting marks.

The under body of 4866 is still showing mostly FCR color for now.  I'll probably weather it darker as it would have had coming from old Pullman scheme.

Other Modifications


I am planning to make a couple more changes to these cars, as Ken's book has shown more of what these non-air conditioned Pullman Tourist cars looked like in SPMW service.  One of the big features about these 1948 conversions is that they do not have roof ducts.  Therefore they also shouldn't have the A/C equipment under the floor.

The Rivarossi models come with three battery boxes on one side, and another on the other side.  The prototype photo of 4866 shows the car does have the large water tank and the short-fat air tank, but nothing else hanging under that side of the car.  I'll probably cover cutting these boxes off in Part 2, which shouldn't be too hard with a razor-saw.

I will also say that these cars had some modifications from 25 years ago, including cutting down the fixed 'diaphragms' and not fitting any new diaphragm (which is correct for most MW cars), body mounting KD couplers on closer couplings, and rebuilding the bolsters to lower the car to more correct heights.

Thoughts of Post-1958 Outfit


SPMW System Outfit Consist, circa 1960 Lone Pine  - owensvalleyhistory,com - ebay47_lone pine_sml

Maybe I'll find another body, and do a post-1958 gray with black lettering version, just to do it for OwlMt to show what they'd look like.  I have this great photo of a gray SPMW Outfit at Lone Pine, which probably was stationed there as they scrapped the track back from the end of the branch at Owenyo in 1960, from the owens valley history website.  This consist has three of these older ex-Pullman 12-1 bunk cars without A/C.

In Closing


I'm going to wrap up this post at this point.  Just to point out, I only used the one set of OMM 1224W for these three cars.  Some creative cutting was used to get '80' and '81' and '72' to get the digits for the '07' and '12' number jumble to work out nicely.  '44's were cut up to provide the leading '4's for the '48' series cars.  Extra hundred series numbers pairs of '44' and '55' are provided for the 4400 and 5500-series cars.  We'll probably change future prints to have an extra 48 or two to help if you focus on these cars.

Completed SPMW 4866 with end-reporting marks too.

Edit, 2023 Nov: After talking with Ken Harrison at the Bakersfield Convention about the patch on the letterboard, I'll probably be patching that section again to full black, as we decided that both patches would have been done at the same time when the SP bought them and struck out the Pullman lettering.

So I'll come back and do a Part 2 with any last touch-ups I do on these cars.  Perhaps, I'll do it on the gray scheme with black lettering...  At some point in the future, if I want to add lighting to these 'camp cars' so that I could do cool night-scenes on the Jawbone Branch, I may refit these cars with Walthers metal trucks as on SP 5199 (Part 1 & Part 7).

Jason Hill

Related Articles:


Chalk Marks - A newer blog on using GellyRoll pens for chalk marks by clerks and carmen on freight cars.

SP 5199 (Part 1 - My build-blog on a 69-BP-30-1 from Southern Car & Foundry.

Freight Car Overview Index - A list of my modeling blogs on various SP & Multiple RR's cars, including many SPMW cars.

Owens Valley History - Website with hundreds of photos of Owens Valley and the Jawbone Branch, which I'm modeling.

Sunday, July 9, 2023

SP 15469 (Part 1) - Lettering Changes & Backdating Rapido B-50-15

In the two previous posts in this series I've covered the History & Roster of the SP/T&NO fleet of B-50-15/16s in Part 1 and the Review of the new Rapido models in Part 2.  This could be considered Part 3 of that series, but I will be specifically working on the SP 15469 model. 

SP 15469 Left side with the finished decals

Stock Model


Stock Rapido SP 15469 with post-1946 lettering and AB-brakes.

Rapido didn't offer the proper pre-1946 lettering scheme, which used only reporting mark initials, not the whole railroad name spelled out, which came in 1946.  So in this post I'll cover the changing of the lettering, backdating it and weathering.

Removing & Painting Underframe


As-Built K-Brakes - painted FCR

The K-brake version of the B-50-15/16 has a very nicely rendered dirt collector 'can' hanging from the trainline pipe on the valve.

Rebuilt car after 1936 with AB-Brakes

I actually swapped underframes with SP 15564, which has K-brakes.  I want the steel resheath car with AB brakes and this backdated wood car to have the older K-brakes.

Disconnect bottom of brake staff

This requires popping out the base of the brake staff from the bracket, which is part of the underframe assembly.  

Underframes removed for painting

Once that is released, the normal method of spreading the sides of the car slightly allows the shell of the car to be removed from the underframe.  

Masking & Painting Body


SP 15469 masked up for blanking out the 1946 lettering.

I masked off the capacity and car number that I wanted to keep with Tamiya masking tape, along with a shortened section of the upper white bar over the initials.  I cut the tape into smaller pieces with a sharp No.11 X-acto blade.

Left side masked and painted

With the underframes removed, I painted them with a lightened StarBrand SP Freight Car Red (FCR) mix in my airbrush. 

Right side masked and painted

The masked body was also shot with the lightened SP FCR, working around the sections of the herald and car measurement blocks.

3/4 view of the left side of the car masked and painted.

I did paint out the "AB BRAKES" stenciling at the far right, next to the ladder as this car will now be equipped only with K-Brakes.

Weathering & Redecalling


Masking removed, right side

The masking was removed and weathering with various earth/brown colors of Apple Barrel acrylic paints were used to cover the color change between the lightened FCR and the original Rapido FCR color.

Masking Removed, left side

This naturally resulted in the car appearing faded and moderately weathered.  I also did a quick pass on the roof, trucks, and ends.  I may add a bit more to the roof.

SP 15469 Right side with finished decals

As part of the weathering to blend the color of the masked parts, I used the acrylic paints to highlight the boards and get a bit of worn out board look, or at least the paint starting to fade and fail.  I also highlighed the trucks with some lighter dusty tan.  This is a quick first pass on the weathering, so I might do more after a pass of dullcote to add some shadow washes on the trucks and boards.

SP 15469 Left side with the finished decals

I used some of the OwlMtModels #1219 SPMW Supply Car decal reporting marks and some remnant decals from the Era-D tare mark & station set.  I selected "BKN 11-47", which is Brooklyn as the reweigh station in November, 1947.

In Closing


I'll probably put some chalk mark decals and routing cards on the car to finish it up before a quick shot of dullcote.

SP 15469 weathered with retare dated SP 15564.

That covers the work on I'll be covering the mechanical modifications in SP & T&NO B-50-15,-16 (Part 3) - Mechanical Modifications of Rapido Models.  I'll also be covering some other smaller changes to the other cars in a upcoming blog posts.

Jason Hill

Related Articles:


SP & T&NO B-50-15,-16 (Part 1) - Modeling, Research, & Rapido

SP & T&NO B-50-15,16 (Part 2) - Arrival & Review of the Rapido Models

Freight Car Overview Index - SP & Multiple RRs Cars.

Ted Culotta Review of Rapido B-50-15/16 - Ted points out several issues with the Rapido model that I missed.