Thursday, December 29, 2016

SP 10250-51-52 (Part 2) - Triple Diner-Lounge 1949

Well, Merry Christmas and Happy New Year's almost here.  Good-bye 2016 and don't let the calendar hit you on the way out!  I will say that I'm pretty happy with the response to this blog.  It has passed 9000 views since the 4th of July!  I also hope that everyone will continue to enjoy the content and hopefully it will be relevant to your modeling projects as well.

Here's one of the upgraded MTH 70-AD-3 Dining-Units with table cloths and replaced letterboard decals for post-1946.

In the last blog post about the SP 10250-51-52 kitbash (Part 1), I started working on the Kitchen Unit SP 10251.  In this post I will start working on the interior changes to the SP 10250 Diner Unit.

History of 1949 Conversion to Diner-Lounge


In 1949 the SP 10250-51-52 & SP 10253-54-55 Articulated Diner-Coffee Shops were reassigned to the San Joaquin Daylight after the discontinuance of the Noon Daylight.  The off-season San Joaquin Daylight didn't need both the articulated Diner-Coffee Shop and a full Tavern-Lounge car.

The Coffee Shop Unit (SP 10252 & 10255) with their mid-car drink station were considered for conversion to the Lounge space, but were rejected as the drink station was located in the middle of what would be the lounge space and there was no refrigerator for the new lounge space either.

It was decided that the rear portion of the Dining Unit (SP 10250 and SP 10253) would be more suitable to have the tables removed and replaced with lounge seats as the refrigerator at the rear end of the Diner would be suitable to store the materials to make the drinks for the Lounge patrons.

Modeling the Lounge Space


I will move to the beginnings of the work to make the Diner-Lounge Unit interior of the SP 10250.

Interior of SP 10250 Dining Unit with tabletops removed in the Lounge section, left.

The Dining-Unit isn't actually that hard to change.  It will consist of opening the unit, cutting through the interior floor and removing the 6 rows of dining tables, 12 tables total.

Detail of one of the retaining clips above the left side of the truck, just below the seat of the chair.

The sides of the interior floor have small tabs that the carside locks into.

Interior Floor removed from new Lounge section

The MTH floor has the seats cast into it, therefore instead of cutting down and destroying all of the interior seating.  One option would have been to leave the seats against the end wall, keeping the fingers of the clip, and removing the cast-in seats.  However, I've chosen to cut that section of the flooring out.  This new floor will need to have at least the end clip replaced on the new floor so the body can snap in.

I removed the tables in the lounge section before cutting it out to keep the tables from being damaged.

Remaining Dining section tables.

The six tables that remain in the Dining section of the unit will have the table tops painted white to simulate the linen table cloths.

With the body back on in this 3/4 high angle view of the Diner-unit without the lounge section interior floor.

A new section of flooring made from 0.030" styrene sheet is cut to be spliced in.  The new section has a screw hole to mount it to the underframe as well.

New floor cut from 0.030" styrene sheet.

Also, I'll cut the new section to include the small notched "fingers" to hold the body on.  The Lounge seats are from several Walthers Lounge cars and a HW Parlor model that I rearranged the interior on, resulting in about 40 extra lounge-parlor seats.

Many reused chairs and a 3-seat sofa from a Walthers Observation and HW 28-1 parlor car are used for the new Lounge.

The SPH&TS Psgr Car book, Vol 4 - Dining Cars, says that the 1949 rearrangement of furnishings to SP 10250 Lounge area would seat 35 and 10253 would seat 34 because one car received a 3-seat sofa and the other car used only a 2-seat sofa.  Because I'm modeling the SP 10250, I get to use a 3-seat sofa and the rest are simple lounge chairs.  Unfortunately the SPH&TS book doesn't have a floor plan of the Diner-Lounge configuration and no photos that I know of, so the arrangement of where the 3-seat sofa goes is kind of a guess.


Here's the new "modular" Lounge and Diner interiors.  The floor of the Lounge section and seats will be painted separately.  Then the seats will be glued in place.  I will probably make a small standee for drinks next to the 3-seat sofa.  I think there might also be enough room on the opposite side for a small standee as well.

I like the idea of easily being able to swap interiors if I want to model the "on-season" versus "off-season" configuration of these cars for the San Joaquin Daylight.  The tables tops will also be painted white to represent the linen table cloths and I may also paint the dining chairs and dining floor as well.

Until I paint the interior - and get warmer weather to do that! -  The SP 10250 will have to wait here.  In the next blog post, SP 10250-51-52 (Part 3) - Cleaning Pads, I'll be showing the fitting of the new Track Cleaning Pads under the Kitchen-Unit (SP 10251) and then the Christmas Joy of filling and sanding the plugs and re-scribing of the fluting.

Jason Hill

Related Articles:
Upgrades and Mechanicals of MTH Daylight Passenger Cars
Modeling Index SP Lightweight Passenger Cars
Modeling Index SP's HW Passenger Cars
Modeling Index Pullman's HW Passenger Cars
Modeling Index Pullman's LW Passenger Cars

Thursday, December 22, 2016

SP 10250-51-52 (Part 1) - Diner-Lounge 1949

As I'm working on modeling the San Joaquin Daylight as it appeared in the early 1950s.  The first kitbash involved a Southern Car & Foundry RPO-Baggage SP 5124 (Part 1).  Continuing work on this train consist means that the articulated diner offered by MTH and BLI's not entirely accurate for the 1939-built articulated dining cars regularly assigned between 1949 and 1952.  If you want to model the San Joaquin Daylight between 1952 and 1954, the kitchen is correct for the 1939-built cars. This project is to see how easy it is to backdate the 1941-built MTH models to represent the 1939-built cars before 1952 and the 1941-built cars before late 1950.

Prototype History of the 1939 Articulated Diners


Construction


In 1939 SP took delivery of two articulated diner-coffee shop cars (SP 10250-51-52 & SP 10253-54-55) and assigned them to the newly renamed Morning Daylight.

Kitchen and Dining Units of the 1941 Daylight Articulated Dining Car

The second two articulated diner-coffee shop cars (SP 10256-57-58 & SP 10259-60-61) were delivered in 1941 and upgraded the Morning Daylights, the 1939-built cars went to the Noon Daylight and the 1937-built single unit Diners and Coffee Shop-Taverns were assigned to the newly streamlined San Joaquin Daylight.

In January 1942 with the discontinuing of the Noon Daylight because of the war.  The 1939-built Triple-Unit Diners were transferred to the San Joaquin Daylight until 1946, when Noon Daylight was reinstated and the 1939-built cars returned to the Noon Daylight.

Diner-Lounges or Back in an Evening


In 1949 the Noon Daylight was discontinued and most of its equipment transferred to the Starlight.  The SP 10250-51-52 & SP 1053-54-55 were refitted with lounge seats to consolidate the services provided by the SP 10200/10201 Diner and the SP 10310/10311 Tavern-Lounges.

Interior Modifications for modeling Diner-Lounge San Joaquin Daylight service in 1949

The lounge seating replaced the 6 pairs of tables nearest the rear end of the unit, leaving 6 tables next to the kitchen-unit.  The lounge seating would be restored to dining tables during heavier traffic between Thanksgiving and New Years and during the summer rush season as well when Taverns would be added to the San Joaquin Daylights.

Continued Modifications & Retirement


The 1939 & 1941-built Triple-Unit Diners used a kitchen-unit with a centrally located loading door for the kitchen and a double high window, with opening panes to load food stuffs into the forward and rear pantry in the unit.   The 1941-built units (57-AD-2s SP 10257 & 10260) were rebuilt in 1950 with the 3 doors in the left side of the kitchen-unit, replacing the loading windows.  The MTH & BLI models therefore are not correct for modeling before 1950 when this change was made.


Penciled in changes of what 10251 and 10254's original window configuration was.

The next year (late 1951) the SP shops rebuilt the two 1939-built units starting with the SP 10254 was rebuilt in November 1951, followed in January 1952 by the 10251.  As I've done a later style Diner for service at LMRC, I'm backdating my articulated diner to be the earlier version to run with Mt's and GS's over Tehachapi.

The SP just couldn't leave well enough alone, the 1939 Triple-Unit Diners were traded out for shopping in December 1954 to become Hamburger Grill-Lounge cars.

It was determined shortly after this that only a Hamburger Grill-Lounge would not serve the passengers of the San Joaquin Daylight as well as originally planned.  Also union agreements had a problem with the combined kitchen space in the new configuration.  This is why for 1955 the San Joaquin Daylight used two separate HW Coffee Shop and Hamburger Grill cars.  Both sets sat in storage

In 1956 the 10253-54-55 set finally was pulled out of storage, the kitchen was rebuilt to provide two separate working spaces and the car was assigned as a protection car for the other two 1941 Triple-Unit Diners on the Coast Daylight and Shasta Daylights.  The 10253-54-55 set was finally retired in 1963.

The SP 10250-51-52 however remained in storage, although there's speculation that there was an accident during the rebuild, damaging the structure of this set.  There are no known photos of the set after it was put into storage.  The SPH&TS Passenger Book simply says the car was never reassembled after it was taken apart in the 1954 shopping.  However, SP records show it be held on the roster as a "relief car" until its retirement and scrapping in 1959.  There's a good chance the car was actually cut up well before that and the whole affair covered up by the shop forces after the suspected damage to the car occurred.

Modeling the 1939 Artic-Diner


The Starting Point - MTH 1941 Artic-Diner


The easiest starting point with the plastic models available today is the MTH or the BLI 1941-built articulated diner.  However

Left side of SP 10261, 70-AD-4 Coffee Shop-unit of the 1941-built set from MTH out-of-box

The Coffee Shop unit will not need any addition body work to backdate, as the 70-AD-2 and AD-4s were virtually the same.

Left side of SP 10260, 57-AD-2 Kitchen-Unit of the 1941-built set from MTH with replacement letterboard decals

The pre-1952 57-AD-1s differed from the 57-AD-2s in that they did not have the access doors on the left side to the forward and rear pantry space, but instead had an extra double hight window which could be opened to allow food stuffs to be passed into the pantries.  On the kitchen unit, this will be where most of the work will be focused.

Left side of SP 10259, 70-AD-3 Diner-Unit of the 1941-built set from MTH out-of-box

The Dining-Units, like the Coffee Shop-Units were virtually identical between the 1939 and 1941-built units.  Modeling the San Joaquin Daylight during the "off-season" when it didn't have a Tavern car (79-T-1 or 77-T-1) in the consist means that the rear portion of the Dining-Unit would have swapped out the rear 12 tables for lounge seating.

Left Side of SP 10315, 79-T-1, Tavern 1939-built from MTH out-of-box

This seasonal "conversion" of the real car would have taken an only a few hours during the consist's layover to have the tables and dining chairs pulled out of storage and moved into the car and the lounge chairs put into storage, or visa versa.

Right side of SP 10250 starting to be converted to Diner-Lounge configuration on MTH model.

As such, this is more of an option to choose which season of train service I want to model with this car.

Planning the Modifications


My usual modifications to the MTH models are done as shown in my MTH Daylight Cars blog page.  This includes rebuilding the trucks, reapplying the window shades with the correct silver reflective side showing to the exterior, Full-Width Diaphragms dressed with a diamond file, and the correcting of the lettering on the letterboards of the cars for post-1946 lettering.

Back-Dating to the Kitchen-Unit (57-AD-1) to Pre-1952 Appearance


I am starting this kitbash by attacking the major work first on the Kitchen Unit, future posts will show the continuing work on the Kitchen and Dining Units, followed by the paint touch up and redecalling of the articulated set.

MTH SP 10260 Kitchen-unit with penciled in backed windows over end access doors.

I started by taking the kitchen-unit and looking at photos sketch with a pencil the window modifications I plan to do.  I will need to find two nearly full height sections of blank carside to make the replacement door plugs for and then cut the new windows in the kitchen wall.

The Kitchen's large water tank will provide a good view block and mass to hide a track cleaning pad under.

I also plan to modify the kitchen-unit with a track cleaning slider pad where the water tank is.  This actually is a good place to hide a cleaning pad because of the skirts and the size of the water tank to begin with.

Water Tank removed and rough cut Masonite pad before mounting.

To start the work on the Kitchen Unit, I removed the water tank to which will allow me the access into the underside of the floor, where I can start pondering the installation of the slider cleaning pad after the body work is done on the unit.

Plugging the Forward and Rear Pantry Doors


Rear Pantry Door marked for cutting.

The first step is to scribe a line around the door frame and then slowly start to deepen it with repeated cuts with a sharp No.11 Xacto blade.  I removed the glass from the interior of the left side of the car body at this point to protect it and make it easier to cut the car side.

Cuts starting to sink into the carside outside the door frame. 

I decided I might want to reuse the doors on some other kitbash, and as I have enough material from the sacrifice SP 3003 Parlor body, I made my cuts outside of the door frame and kept the door in one piece.  If this is not a concern, then I would start "nibbling away" at the door starting from the window hole, or even using a Dremal cutting tool to quickly cut out the majority of the door to within about 0.03" of the desired edge.

SP 10251 on the left, and the sacrifice SP 3003 body on the right with saw cuts.

The SP 3003 Parlor car body is not needed for my modeling of the San Joaquin Daylight, so is being used as a source for the complex fluting of the car sides and hopefully will also require very little touch up of paint and stripping decals.  Some plugs I plan to remove from the Parlor car sides will also go to my SP 3301 combine model.

Finally the Xacto is breaking through.

The trucks were also removed from the kitchen unit to protect them as I removed and installed the floor and interior several times to provide support to the car side while cutting.

Scribing with the Xacto blade from the inside of the shell was also done to create a failure line to "pop" the door out from the car side.  This inside scribing is made easier with an LED flashlight shining through from the outside of the shell, creating a "high lighted" line around where the cut is working in from the outside.

Here the scribed interior cuts allow the door to fold inward.

I also removed the steps from the skirting before I started cutting with the Xacto blade.  I saved the steps in case I need them in the future for any reason.

Door cut about 98% of the way through, as the top edge fatigues and breaks free.

Carefully the door is cut free and some basic filing is done around the opening to square it up somewhat.

Here the plug cut from the Parlor body is trued up and is about 1/16" longer than needed.

Next will come the slightly longer process of carefully filing down the plug to exactly fit in the old door opening.  This will also include some filing of the opening to mate well before gluing in place.


A view of the plug laid over the opening of the rear pantry doorway.

That will do it for Part 1 of modifying the SP 10251 Kitchen Unit.  In the next blog post about the SP 10250-51-52 (Part 2) - Diner-Lounge 1949 Conversion, I will be finishing the rear pantry plug installation and working on the next steps.

Jason Hill

Related Links and Pages: (Note some pages and blogs aren't posted yet)
MTH Daylight Cars - Mechanical & Detailing
Modeling the San Joaquin Daylight (Nos.51 & 52)
Modeling the Sacramento Daylight (Nos.53 & 54)
Modeling San Joaquin Daylight RPOs (Part 1) - SP 5124
SP 2436 (Part 1) Upgrading an Athearn-Genesis 77-C-3 Chair Car
Index of SP Lightweight Passenger Car Models
Index of SP Heavyweight Passenger Car Models
Index of SP & Pullman Lightweight Passenger Car Models
Index of Pullman Heavyweight Passenger Car Models

Friday, December 16, 2016

SP Tender Swapping (Part 1) - A Game for Prototype Modelers

Prototypical modeling of SP steam engines means more than just learning about the different wheel arrangements of the engines and differences between the different classes within a wheel arrangement.

The SP Mechanical Dept. inherited the Common Standard system of classification.  Much like the passenger car classification system.  This system used a combination of numbers, letters, followed by more numbers.  For example 120-C-2 means the tender has a water capacity of 12,000 gallons, it has a cylindrical tank construction, and is the second class of such specifications.

A general note should be made that the SP moved to put 'high speed' trucks under tenders assigned to faster passenger engine types of engines.  Most SP classes after about 1930 that continued to be used in high speed service had 6-wheel trucks assigned to them.  The slower freight engines and road-switchers used the 4-wheel trucks (120-C-2 and -7) and Andrews-style trucks on the smaller tenders.

Overview of Tender Classes


Let's have a quick look at some common models of various SP tender classes.  This will give us a basis to follow a few easy tender swaps.

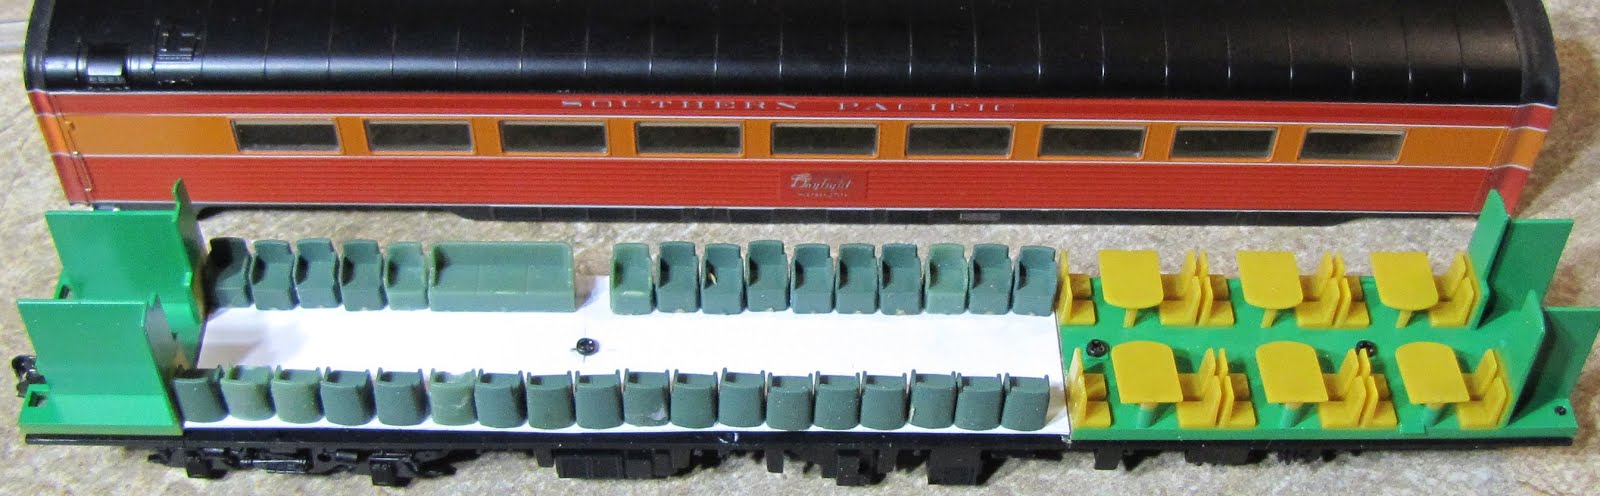
Some of the tender classes I will be showing.

Cylindrical Tenders


Tenders Smaller than 90-C-series


There were a number of tenders built in this group.  I will not be talking in depth at this point about tenders that are smaller than 9K.  Most of these tenders fall into the 70-C-seriers of tender.  Over the years these were modified and placed behind smaller and smaller engines, generally ending up behind engines assigned to switching service or requiring short tenders to fit on smaller turntables.

70-C-1/2 Class


A retired SPMW 70-C-1/2 tender from MDC/Roundhouse kit with full-width fuel bunker.

Most of these tenders became fodder for rebuilding into the later 70-C-9 and -10 class switching tenders with narrowed fuel bunkers.

70-C-9 Class


70-C-9 tender from Sunset S-8, -10, -12.

3/4 view of the narrow bunker on the 1213's tender.

The only one that I'll talk about this time is one from the SP 1213, which was one with the modified bunker which was narrowed for better crew visibility when looking to the rear while switching.

70-C-10


SP 70-C-10 tender on the left, with a 70-C-9 on the right. - Both Sunset Models tenders.

Sunset Models imported 70-C-10 class tenders with their 2-6-0s among other engines.  The SP's 1950 tender roster only shows two of this tender class in service, compared to 50+ of the 70-C-9s.  The -10 class has a rounded fuel bunker, which follows the side of the tank and probably simplifies the narrowing of the bunker.

Moving on...

90-C-series


Tenders with a nominal 9K gal water tank, cylindrical design.

90-C tender with low walkway boards - Sunset

The tender above came with a 1980's Sunset C-9 class 2-8-0.  It turned out that this tender wasn't what the C-9 needed to match the photo I had of the engine I wanted to do.  Turns out that the Balboa 100-C "Alternate" tender (seen below) from a Mk-5/6 was the right tender for the C-9.  This tender then became a "spare".  Recently I traded it with a friend for a WSM 100-C "Common" tender (also seen below).

90-C tender from SP 3000/3001 A-6 by WSM/KTM

This Daylight painted 90-C tender is from a A-6 class 4-4-2 from WSM/KTM.  Two engines 3000 and 3001 were painted with Daylight colors on the cab and tender for use on the Sacramento Daylight in 1941.

Moving on...

100-C-series


Tenders with a nominal 10K gal water tank, cylindrical design.

Left - WSM "common" tender & Balboa "Alternate" tender with replacement trucks from Mk-5/6.

Above are the following two tenders placed bunker to bunker to show the differences in the bunkers of the two tenders.  Notice the one on the right has a longer and shallower slope sheet than the one on the left.  While this is subtle, it can be noticed in photographs of the real engines... and with the right model, you can replicate this as well.

100-C-3/4/5/6 (Common)


100-C-series tender - by WSM/KTM - These are VERY common models.

These are certainly one of the most common tenders behind the large numbers of WSM/KTM models imported over the years.  These are standard behind the models of T-28, T-31, P-4, P-5, and others.

This is the type of tender my friend traded to me for the 90-C above, it will soon find a home behind some other medium or small SP steam engine.


100-C-3


SP 8200-8238 (39 tenders, inclusive)

100-C-4


SP 8330-8449 (120 tenders, sans 8333, 8334, 8366 as of June 1, 1950)

100-C-5


SP 8450-8458 (9 tenders, inclusive)

100-C-6


SP 8194-8199 (5 tenders), 8459-8489 (61 tenders)

100-C-1/2/7 (Alternate)


100-C-1/2/7 with more angled fuel bunker - by Balboa from their Pacific Lines Mk-5/6 model - Wrong trucks.

100-C-1


SP 8000-8052 (31 tenders, sans 8003, 8006, 8009, 8010, 8011, 8013, 8017, 8018, 8019, 8021,8023, 8024, 8025, 8027, 8038, 8042, 8045, 8047-8050, as of June 1, 1950)

100-C-2


SP 8100-8124 (25 tenders)

100-C-7


SP 8490-8499 (10 tenders)

Balboa's Mk-5/6 "Pacific Lines" Medium 2-8-2 comes with this slightly different version of a 100-C tender (100-C-1/2/7).  It can be seen in photos of other engine types.  The trucks however are always the standard SP Andrews tender truck, so replacement trucks are in order.

100-C-1/2/7 class Balboa tender from Mk-5/6 with replacement Andrews tender trucks.

The Mk-5/6s seem to have lost these tenders before the late 1940s, so modeling a Balboa Mk-5/6 will also involve looking for a different tender.

This it turns out was the correct tender to have behind the C-9 (2-8-0) that I wanted to model, so my first tender of this type went to it.  A number of C-8/9/10 engines have this style of tender, with the heavy angle in the bottom of the bunker and the shallow slope angle of the bunker being easily spotting features.

The next larger series of tenders were more numerous in classes and all were rather distinctive...

12000 Gallon Tenders


120-C-1


Sunset "120-C-2" with trucks from 120-C-1 - oops!

SP's 120-C-1 tenders were all rebuilt into 120-C-7 tenders and reused most of the parts including the same trucks.

The 120-C-1s used the trucks that Sunset Models put under the 120-C-2 tenders below.  This means that the Sunset Models 120-C-2s are actually closer to 120-C-1s in appearance.  This issue applies to the tenders imported for Sunset's 1990's production of painted SP F-3/4/5s and also the older unpainted F-1s, Mk-2s, & Mk-4s as well.

120-C-2


Note: that the 120-C-2s are the first SP tender class here to use a longer 6'3" wheelbase 4-wheel truck with a longer wheel base than the Andrews-style trucks shown above.  The 120-C-2 tenders had trucks with clasp brake shoes which were hung from longer horns at the ends of the truck side frames.

The trucks on the model below make these models more correct for the 120-C-1 class tenders as noted above.  The other option is to trade these trucks to other tenders to make more correct combinations.

120-C-2 extra tender from Sunset's importing of their F-3/4/5 series engines during the 1990s. (should be 120-C-1 model)

The 120-C-2 tenders were very common behind Mk-2, -4, -5, & -6 class 2-8-2s, all classes of 2-10-2s (especially the F-1s).  They were not commonly used behind passenger engines such as the Pacifics (P-series) or Mountains (MT-series) because of the 4-wheel trucks.

SP 3259, a heavily modified Balboa Mk-5/6 with a new 120-C-2 tender.

I believe one of my first 120-C-2s came from a Sunset F-5 class 2-10-2.  It was quickly traded to a Balboa Mk-5/6 the SP 3259, which had correspondingly had traded its alternate 100-C to the C-9 (mentioned above).

120-C-3 & -6


Athearn-Genesis 120-C-6 tender (unlettered)

Athearn's after-market tender-only model of a 120-C-6

There's nothing saying that you have to use a brass tender with a brass model or a plastic tender with a plastic model.  Thanks to Athearn bring these tenders out separately, we can now give models an upgraded tender, which many engines after WW2 received.

This class was very common behind SP 2-10-2s of F-3 & -4 classes, MT-1,-3,-4,-5 class 4-8-2s, 2-8-2s in Mk-5 & -6, later class 4-6-2 Pacifics (P-8 & P-10 especially), Even a few C-class 2-8-0s received these big tenders - and looked rather strange after words!

120-C-5


The 5th class of 12K tender SP ordered was different in that the fuel bunker sloped all the way up and to the rear until it meets the top of the tank.  The tank sides are also vertical, but set in from the sides of the bunker.  This results in a VERY distinctive tender, which is easy to spot in photos.

Side view of 120-C-5 WSM model

The 120-C-5 tenders were ordered for delivery with the SP's big 4-10-2 (SP-1,-2, & -3) engines of the 5000-series.  They then started wandering around to assignments behind other smaller engines as the SP-class engines were upgraded with 160-C-series tenders fairly quickly.

120-C-5 rear 3/4 view of WSM model

Also see 120-C-7 and 120-C-8 classes below.

120-C-7


This class of tender I believe could be kitbashed from a 120-C-5 with an additional bunker top, such as the 160-C tender have.  The tender will also need a set of 4-wheel trucks.

These tenders were common behind mid and large sized SP engines, F-class (2-10-2) and Mk-5/6 series engines also.

120-C-8


This class of tender I believe could be kitbashed from a 120-C-5 with an additional bunker top, such as the 160-C tenders have.

These tenders with 6-wheel trucks were common behind P-class (4-6-2), F-class (2-10-2), and Mt-class engines.

160-C-series


These tenders, the largest of the cylindrical type tenders, had what was called a "water bottom" frame.  The frame was actually part of the tank.  This allowed for a flat bottom and top to the tank.  These tenders are sometimes referred to as "semi-cylindrical" by some railroads... however on the SP the SC-type tenders as they're called referred to something completely different as we will briefly see below.

160-C tender from Sunset

The 160-C series tenders were used both with AC-4, -5, & -6 and large conventional engines of SP (4-10-2), F (2-10-2), GS-1 (4-8-4), Mt (4-8-2), and even a few of the T&NO's large Pacifics.

160-C tender from Sunset, rear 3/4 view

The 160-C-series tenders from retired AC-4, -5, & -6 engines were handed down in the early 1950s to equip more F-class (2-10-2) and Mt-class (4-8-2) engines with larger tenders.  By 1954, many 2-10-2s working the San Joaquin Valley freight pool had 160-C tenders instead of their smaller 120-C tenders.

Rectangular Tenders


The rectangular tenders the SP owned will be discussed later in more detail.

220-R-series


Intermountain 220-R tender from an AC-10, -11, & -12 model.

These tenders were specifically built for use with the late model AC-class (4-8-8-2) engines.  Note the T-handle on the oil bunker lid.  This was to lock the lid down so the fuel bunker could be pressurized to 5 PSI, forcing the heated fuel oil to flow the extra distance up to the firebox.  This was also standard on the 160-C and 120-SC tenders assigned to the earlier AC-class and AM-class cabforwards.

230-R-series


There were several tender classes in this volume series.  Some of these big tenders were bought from the C&O and used with the AC-9s and some other large classes, such as the F-5 class (2-10-2).

Semi-Cylindrical Tenders


"Whaleback" SC-series Tenders


These tenders are very uniquely SP in design.  They're used behind many classes of SP engines including the larger ones behind early AC-1, -2, -3, AM-1, and the tanks of this style installed on the ex-B&M 2-8-4 (SP class B-1).  Smaller versions of this tender were commonly seen behind other smaller classes.  I will not be going into very much depth of this type of tender in this post.

120-SC-series tenders are arch-topped tenders.

73-SC & 78-SC-series


An Oriental 73-SC-type "Whaleback" tender.  Similar to Sunset and other importer's models.

This class was most often seen behind C-class 2-8-0s, M-class 2-6-0s, and the occasional S-class 0-6-0s.

120-SC-series


These tenders came from retired AC-1, -2, & -3 (2-8-8-2) and MC-1 (4-6-6-2)  class Cabforwards.

120-SC-series tender with as-built straight profile

These tenders also show up behind Mk-5 & -6, Mk-7 & -8 (Ex-EPSW) 2-8-2s, F-1 2-10-2, and even C-class 2-8-0s.

Swapping Tenders


Swapping tenders between different classes and engines within a class was a very common practice on the SP.  Many models are build with one, maybe two types of tenders.  Often the older brass models get the "Standard" tender from that manufacturer or importer.

Unfortunately this is the best photo of the original configuration of SP 2850 that I have, circa 2004.

This is the original Sunset tender that came with the 2850.

Around the same time I picked up a Balboa Mk-5/6, which would become the SP 3259.  However it had a very weird little tender that didn't last on Mk-5/6s past about WW2.  Looking at photos the SP 2850 had just such a tender... although with standard Andrews trucks, not the more "express" style trucks of the Balboa model.

Ah, but wait, here's that extra Balboa Mk-5/6 tender

And again with replacement trucks

The SP 2850 now has the correct tender... but what about the Mk-5/6 that gave its tender up?

SP 2850, with Balboa Mk-4 tender (100-C "Alternate") weathered with 'mud' which nicely matches the Caliente scenery at LMRC.

Buying that Extra Tender


Some importers have commissioned extra tenders to be made, so there are extra tenders that wander around on the market.  The SP 3259 could have received a replacement or "extra" tender from a hobby shop, train show, or ebay such as this 120-C-2 from Sunset, below.

This is an example of a Sunset 120-C-2 tender that can be found by itself if you need an extra tender.

In reality, I ended up trading another friend for a Balboa 160-C tender that I had, in exchange I received a 120-C-2 Sunset tender.  The Balboa engine received a PSC 120-C-3/6 tender that I acquired.  This was all in the days before Athearn-Genesis released their fine 120-C-6 tender.

An unpainted Balboa Mk-5/6 with 100-C- "alternate bunker" tender

Comparing the photo above and below, one can easily see that Balboa's Mk-5/6 with the 100-C tender was trying to be a 120-C-2 tender, but somewhere they got the idea that the 100-C with the "alternate" bunker was the same tender as the 120-C-2 tender, and tried to put some other trucks they had on hand under.  In any case, this just means a bit of extra work for us finding a new tender.

SP 3259 is now happily re-equipped with the correct tender and returned to service

Well, here's another example.  Another Balboa Mk-5/6 again with an extra 100-C tender that will be handed down to some other smaller engine needs a new tender.  This time an Athearn 120-C-6 is selected to match the SP 3266.

Athearn-Genesis 120-C-6 tender can be bought today from a hobby shop or special order for your tender swapping needs.

SP 3266, with a new Athearn-Genesis 120-C-6 tender which was bought undecorated and will soon be decalled.

In both of these cases the model is made correct to the prototype photos and information by acquiring an extra tender.  The old tender can usually find a home with another engine or be reused in maintenance of way service.

An SP 60-C tender with full-width oil bunker (MDC/Roundhouse) in SPMW service

The SPMW 8241 is a model of a tender retired from assignment to a locomotive, and now is assigned to a steam crane or pile driver.  Some old tenders were reassigned to rotary snow plow service or water service after the end of steam.

The Direct Swap


The other option is to find the right two engines that have the wrong tenders and do a straight swap.  Some of my earliest engines happened to have the right tenders for each other.

A 160-C tender

A 120-C-5 tender

A Sunset F-5 came with a 160-C tender, a Sunset Mt-3/4 came with a 120-C-5 tender.  The Mt's almost exclusively didn't use 120-C-5 tenders after about 1946 according to the photos I had.  The number I would choose would need an Mt with spoked main driver, standard crosshead guides, and skyline casing.  I found two engines that were photographed with 120-C-5 tenders after 1946... however they both had either multiple bearing crossheads or replacement disc main drivers.  Neither of those options sounded like fun to fix.

Here's the 4341 with its new replacement 160-C tender.

The Sunset 2-10-2 F-5 class engine that I had (SP 3727), was needing a new number anyway as another member beat me to the number!

An SP F-5 class 2-10-2 waiting for a new number and tender

I looked though some photographs.  SP 3757 was photographed with a 120-C-5 tender.  The rest of the engine details seemed to match up with the model of 3727.  So I redecalled the F-5 by changing one number.  The tenders were easily swapped and patched to change the numbers on the rear of the tanks.  A few years later, and upgrading to DCC required me to change the engine yet again because of a conflicting DCC address with another engine.  This is especially an issue now with DCC.  In a way this was a cloud with a silver lining as it would give me the chance to find another number.

In the end this is a great example of two engines getting a direct tender swap and the owner coming away with two correct models at the end of the day.

In Closing


SP 3670 was another engine that enjoyed the game of musical tenders - and a trip through the boiler foam weathering too!

These games of musical chairs with tender can evolve quickly into three or even four tender trades to get all the engines ending up with historically correct tenders.  While sometimes these can result in easter egg hunts that may last years, they are often very rewarding when finished.

Jason Hill

Related Links:
Modeling SP's Steam Road Switchers (Part 1) - Light

Modeling SP's Steam Road Switchers (Part 2) - Medium