Monday, June 19, 2017

Santa Fe Cabooses (Part 1) - Steam Era

While the engines on our trains get the most attention and pictures, modeling the other end of the train is also important as the cabooses were as unique to a railroad as its engines were.  Assigned cabooses and waycars were normal in the days before pooled cabooses, I'll be mentioning some of the regular assignments which my models are assigned to as well.

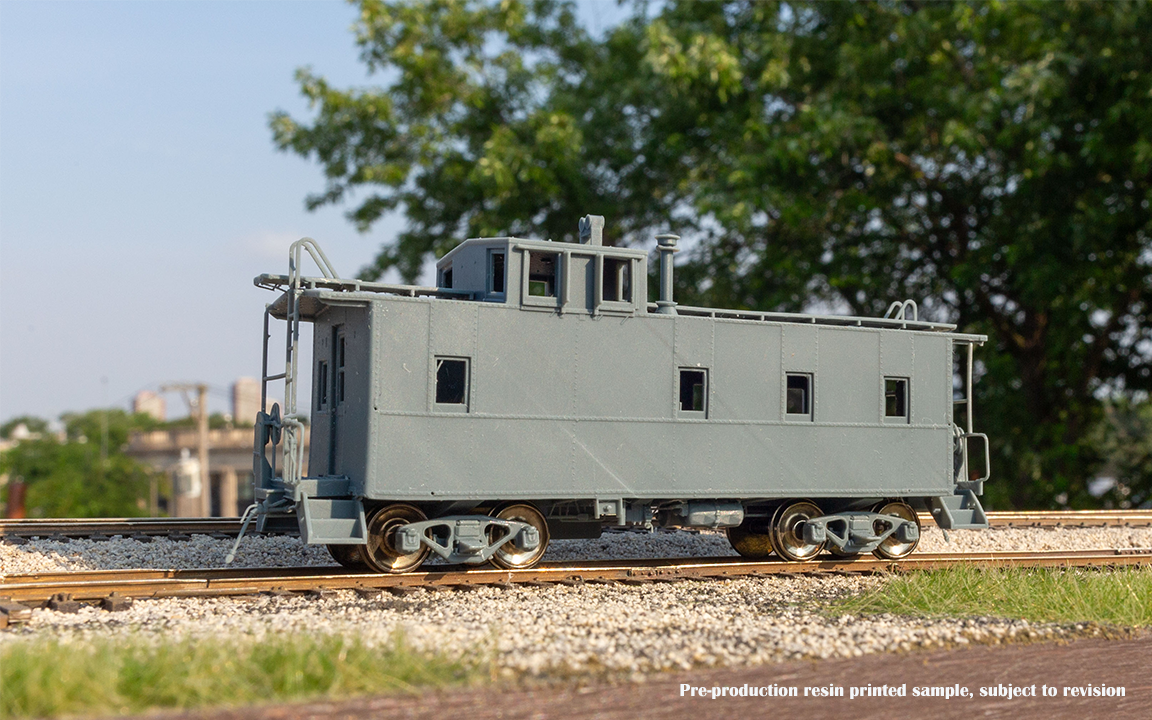
Partly hidden behind other cars in the yard is the Santa Fe caboose track at Bakersfield, Calif.

Since I've been posting about SP cabooses earlier this year, I though we should have a quick look at some of the Santa Fe "Way Cars" as they're called by Santa Fe officials.  While most of my blogs have been related to modeling the SP, I do model some ATSF (Santa Fe) equipment as well because of the joint operations of the two railroads over Tehachapi Pass.

ATSF 1300-class (Wood Bodied Waycars)


These are kits and R-T-R models from Walthers with arch-bar trucks.  These cars used truss rods as well, even though they had steel centersills.

ATSF 1364 - Arvin Road Switcher (Local Service)


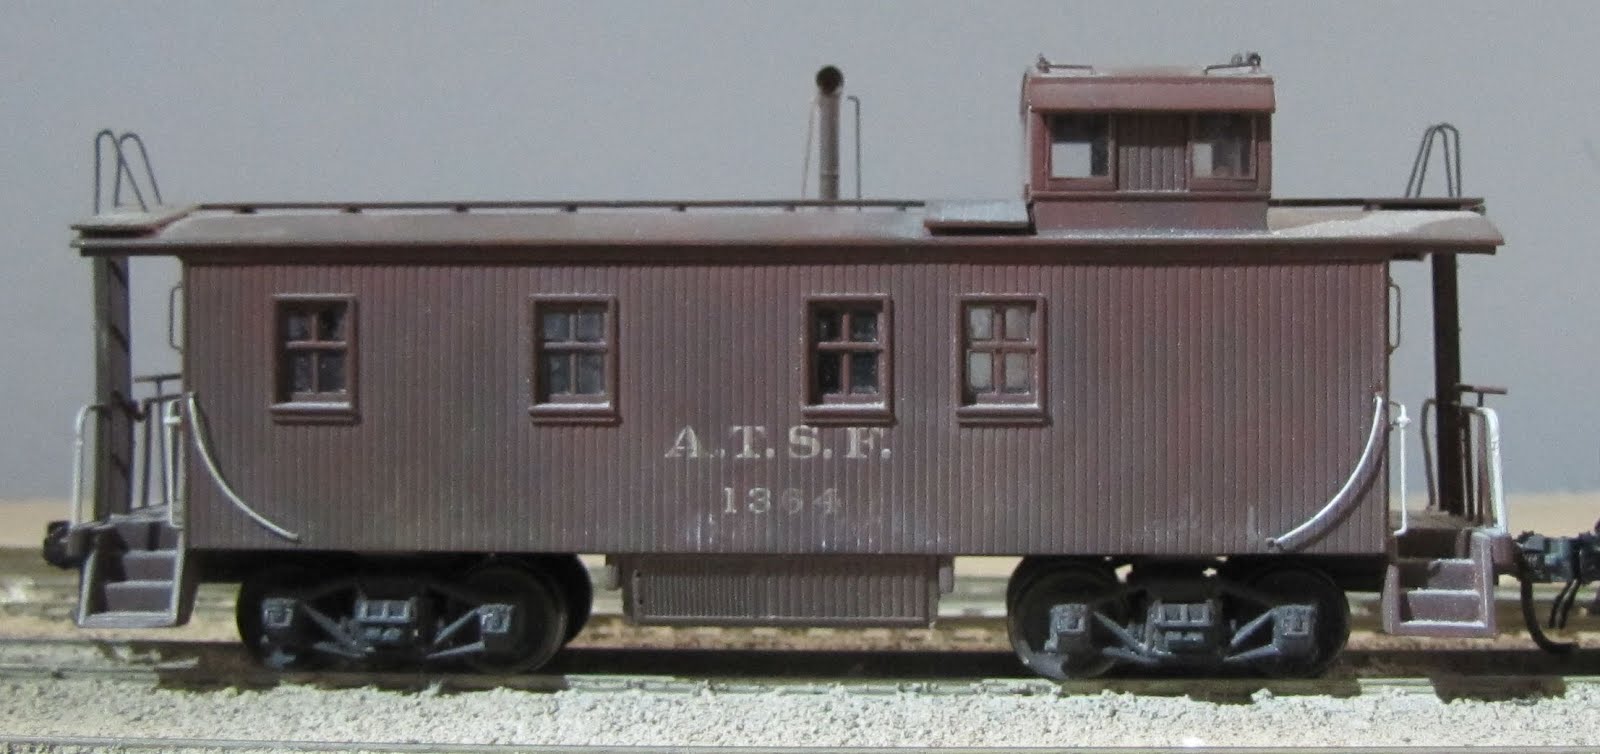
Here's the first 1300-class cars I built, it's regularly assigned to the Arvin Road Switcher at La Mesa Model Railroad Club.

The Arvin Branch is worked by a regular day-shift "Arvin Road Switcher" which is assigned the 1364, the "Arvin Turns" working the empties to the branch and return the loads to Bakersfield is assigned a weird steel caboose 1941.  The 1941 is also used by the "Extra Arvin Switcher" which is often called to work after hours (night-shift) on the branch.

ATSF 1421 - 1st District Local & "Super Locals" (Symbols 55 & 56)


This is the second 1300-class car I built from an RTR model - Regularly assigned to the valley locals north of Bakersfield.

Generally, I've considered these cars to be relegated to local service by the 1950s era operating sessions on the Tehachapi Sub that the La Mesa Model Railroad Club.  By far the all-steel waycars were dominate after WWII, so we've tried to keep the number of 1300-class cars to a minimum.

(All Steel Waycars)

This is an example of an Intermountain "ATSF cupola way car".

These models are easily made with Intermountain RTR or Athearn (Blue-box) RTR/kits.

Around 2005 the La Mesa Club's operating sessions were becoming desperately short of Santa Fe waycars, so I picked up four more Athearn cabooses.  The Athearn models are what I've focused on making my models from because they're more economical to find.

The modifications are pretty simple with a handrail bent and fitted around the top of the cupola, a second tool box, and Tichy "Caboose trucks" with leaf-springs installed.

1500-class (Steel bodies with wood tool boxes)

This series of 150 cars were built in 1927 by ACF and numbered between 1500 and 1649 with KC brakes with vertical staff hand brakes.  This series also had roofwalks in what Andy Sperandeo called Alternate Cupola Laterals arrangement.  I modeled these two cars from his article in Chapter 23 of Model Railroader: Freight Car Projects & Ideas. (Published 1997 by Kalmbach)

All Santa Fe waycars in these series were built with two tool boxes.  The later cars need two steel boxes, so my easy solution for that is to model half the cars in the earlier series that have scratch-built wooden tool box covers.

ATSF 1579 - Road Waycar


ATSF 1579 is a basic plain Santa Fe brown waycar in post-1943 lettering without the periods in the reporting marks.

ATSF 1563-R - Road Waycar - (Radio Equipped)


The first Santa Fe waycars fitted with radios were marked as such by a suffix "-R" after the car number.

Unfortunately it's just out of the top of this photo, but the car is also equipped with a DTA "wagon wheel" radio antenna on top of the cupola.

1659-Class (Steel bodies with steel tool boxes - early)


This series of 90 cars (possibly 100 cars if Andy Sperandeo made a typo on the class' first car number) numbered between 1659?-1749 built in 1928.

This series had vertical staff hand brakes.  The following 1750-class cars in 1929 by ACF and had Ajax hand brakes.  The 1750 class cars totaled 125 cars numbered between 1750-1874.  These two series of cars were built with "Alternating Cupola Laterals" which followed the earlier 1500-class cars, but now had steel tool boxes.

1875-class (Steel bodies with steel tool boxes)

This 1875-2000 series of 125 cars were built by ACF in 1930 and 1931 and had Full Cupola Laterals.

These cars are basically identical to the earlier 1500-series cars above, except that they received the second steel tool box cover from the early series cars.

ATSF 1981 - Road Waycar


ATSF 1981 is a pretty plain all-steel waycar, seen here with some GP7s hanging around behind the caboose track

The ATSF 1981 is one of my favorite way cars for a "classic" look of an "average" Santa Fe caboose from this large class of cars.

2001-Class (Last class of steel arch roof cupola waycars)


The 2001-2200 series cars were built by ACF in 1942 and had full cupola laterals and wide end lateral installed on the short end of the car.

ATSF 2164 - Road Waycar - Safety Slogan


Here's one of the Santa Fe "Safety Waycars" that Athearn produced around 2005 as an RTR model.

My model of ATSF 2164 was one of those "Ok, I'll just get one of these and trust that Athearn got the number right!" model purchases.  It was also the last of the cars at the local hobby shop at the time when I purchased these four cars to build, so I picked it up.  I'm glad that no other members have bought any other odd-ball waycars like this.   As too many "weird" or "rare" cars would cause indigestion of belief for operators and viewers.  Better to stick with the meat and potatoes of the fleet when modeling!

Out-of-Era Notes


Here ATSF 2035 shows it's new reflector crosses along the carside and a large base-plate radio antenna up on the cupola.

I should also mention here that there are a few tips-offs that a Santa Fe waycar is well after the steam era.  One is the addition of the small Santa Fe cross-heralds along the bottom of the carside.

ATSF 999081 a CE-1 way car at Niles Canyon in 2009. Jason Hill photograph.

Santa Fe cars in the 999000-series are of course the later rebuilds of the waycars after the 1960s, so are very much out of scope for my 1945-1955 modeling zone, and the scope of this blog post.

Other Santa Fe Waycars


Santa Fe also had some of the 1949 built 500 & 2201-class steel cars by the era I model, however these cars had peaked roofs, so I decided not to modify any of my 2005-era cars.

Santa Fe also had a number of old steel passenger combines and steel drovers cars in service after WWII until the early 1960s.

I'll also mention briefly that old passenger steel coaches were used on mail trains and other express trains.  I'll probably do a blog as I start to build some old Walthers metal passenger car kits of these in the future.

In the future I'll probably touch on some later era CE-rebuilt series Santa Fe waycars and possibly the Centralia Carshop's models of these modernized cars.

Closing Thoughts


ATSF SCX-BI climbs over Tunnel 9 at the "Tehachapi Loop" with ATSF 2060 bringing up the markers.

I hope this has touched on some options for the Santa Fe modelers out there.  I'll probably be touching on some other Santa Fe models in the future as well.  Part 2 will be a  step by step blog on modifying an Athearn BB model.

Jason Hill

Related Links:

A trip on the Santa Fe SCX-BI during a 1950s Operations Session at LMRC

Modeling SP Cabooses (Part 1) - Ex-Coaches

Modeling SP Cabooses (Part 2) - Wooden Cupola

Modeling SP Cabooses (Part 3) - Steel Cupola

Sunday, June 4, 2017

Mt. Nebo (Part 2) - Internal Lighting

In Mt. Nebo (Part 1) I talked about the basic upgrades to the old metal Walthers 10-Section-Observation-Lounge car and the interior.

Pullman Mt. Nebo with lounge interior lit for service.

In this blog post, I'll quickly show how I added lighting to the Mt. Nebo.  This will be a brief overview of the lighting of a car like this.  I'll be covering it more in depth in SP 5199 (Part 7), which I'll be posting soon.

Lighting Systems


The time has come for the interior lighting to be put in the car.  This was easily done with a 3" strip of LED lights which I'm using as my standard lighting installation in passenger cars now.

The lighting comes in rolls like this, which are easily cut to length with scissors.

The 3" LED section has ground and 12VDC contact patches which are tinned and wires attached to.

A strip of 0.125 x 0.250" styrene strip is ACC'd to the back of the LED strip for support and mounting in the car.

Installation


Four 1/16" holes were drilled just outboard of each bolster and next to the centersill.  I use these to run the 32-gage (TCS-brand) wire up through the floor from my truck pickups.  Once inside the car, I used some Tacky Putty from Lock-Tite (Walmart) to secure the wires inside the rear observation door posts, making sure to leave enough slack in the wires for the truck to move freely.

The trucks are using OwlMtModels' new #10001 Walthers Truck Pickups, which are designed to fit Walthers trucks and provide a good way to attach wires to the truck sideframes.  I will be covering those next post in more detail once they are released for sale.

Lighting bar installed in the Mt. Nebo.  The wires to the right go to the front truck.

I tried first installing the lighting strip pointed up, however it was too far up inside the clerestory of the roof for the light to bounce down into the interior of the lounge, so I reversed the strip and remounted it directly on top of the bathroom walls and the Tacky Putty on the rear wall of the car.


The Right Rail wire is run along side the plastic strip to the 20K ohms of dropping resistors (two 10k Ohm) which are soldered to the LED strips' +12VDC contact patch.  This car will spend most of its life on DCC power (AC-current) so the positive and negative comments are simply to keep things straight while wiring.

I also like to have the lighting subtle in the car, not like there's a nuclear power plant under the car, so even though the LED bar is designed to operate on 12VDC, I'm dropping it WAY down so the LED's don't blast the inside of the car, only an inch away, with too much light.

The Results


The effect is hard to photograph, but these give some idea of how it looks.  The human eye can adjust better to low light and not be blinded by the subtly brighter lights inside, where as the cameras try to adjust to one or the other.

Left rear corner of the lit Mt. Nebo.

Left side of lounge with mantle at left and the desk beyond, and lounge chairs to the right.

Lounge seats, writing desk (blue chair), center mantle desk (behind), and men's lounge (restroom) with sink at right.

Writing desk's chair and men's lounge (restroom) sofa.

Right rear corner overview photo of the lounge section.

Off into the Night


It's rather amazing that a Walthers metal kit, like this one....

Unbuilt Walthers 10-Section-Obs-Lounge Kit

... can be turned into a car like this!

Left side of PC Mt. Nebo


Right side of PC Mt. Nebo

The last two steps on the Mt. Nebo will be installing marker lights and redetailing the underframe with new, more accurate parts.  That will wait until next time however.

Jason Hill

Related Links:
Pullman Mt. Nebo (Part 1) - 10-Section-Obs-Lounge

Index for Modeling Pullman Pool HW Passenger Cars

Index for Modeling SP HW Passenger Car Classes

Modeling SP 5199 - 69-BP-30-3 from SC&F Resin Kit (Part 1)

Modeling SP HW Clerestory Coaches (Part 1) - Starting Over with SP 1050 


Friday, June 2, 2017

SP Cabooses (Part 3) - Steel Cupola Cabooses

The C-40-1s were built following the same body design as C-30-series cupola cabooses (which I discussed before in my blog - SP Cabooses Part 2 - Wooden Cabooses) but with steel bodies and evenly spaced long end windows.  The SP built over 200 steel cupola cabooses between 1937 and 1942, just in time for the heavy press of wartime traffic.  By the 1950s many road freights were using steel cabooses, and fewer and fewer wooden (with steel underframe) cabooses were used.   Most of the wooden bodied cars being assigned to branchline traffic and locals.

Here's a very nice budget brass C-40-1 steel caboose model.

The C-40-1 class cars were numbered between SP 1000-1049, built in 1937.
The C-40-3 class cars  were numbered between SP 1050-1234 & T&NO 400-429 and built between 1940 and 1942 in several groups.

The C-40-1 only had one smokejack and the following C-40-3 class cars had two smokejacks, as built.  The second one is located opposite the cupola on the left side of the short end of the caboose.

Many of these cars lasted until the end of cabooses on the SP in the 1980s.  In later years various windows were plated over and other fittings were mounted for power generation, etc.

There are many models available for them.  I will discuss some of them here.

Rapido (Plastic - Announcement Sept 2023)


New Rapido C-40-3 Pre-production photo - from Rapido website

C-40-3 Announcement & reservation page.

It appears that Rapido is planning to offer 20 versions/road numbers of this body style.  I'll quickly break down the eras and schemes.

As-Delivered = 1937-1946 - SP initials
Serif with lines = 1946-1953 - SOUTHERN PACIFIC - with bars over road name and under road number.
Serif w/o lines = 1953-1956(ish) - SOUTHERN PACIFIC - without bars over road name and under road number.
Gothic Lettering = 1956+ - Orange Ends, and other versions start changing roof-walks which would permit kitbashing of window plugs into the 1970s and 1980s versions.

Brass Options


Balboa C-40-1 - $~75 unpainted


Many years ago Balboa brought in models for C-40-1 steel cabooses.  Generally these were unpainted, but today many of them have been painted by modelers over the years.  This means you can find them anywhere from unpainted, to poorly painted, poorly decalled, up to REALLY nice models.

Left side of Balboa C-40-1 unpainted

Right side of Balboa C-40-1 unpainted - some skin damage during soldering showing on the lower center part of the body.

Here's a 3/4 view of the right rear corner, some additional damage just above the belt rail.

Left front corner of the Balboa Models C-40-1, ready for media blasting and paint.

Bottom view showing the layout for the brake parts and truck bolsters.

The rest of the underframe parts were in a small plastic bag along with some markers for the modeler to install.

Painted, decalled, and finished as SP 11, rebuilt C-40-1 from a C-30-1 cabooses.

Here's one finished up and ready for service.  SP generally numbered the new C-40-1/-3s into the SP 1000-1199 series, but some were built as replacement cabooses for retired C-30-series cars below 900 as there were vacancies in the roster.

SP 11 was built as C-30-1 in 1925 and rebuilt to C-40-1 standards.

Challenger Imports C-40-1 - $250+ painted


Left side of Challenger C-40-1 caboose

Like most high end brass models, Challenger knocked the ball out of the part with these models!  ...with a price tag to match.  This model operates very nicely with minimal extra work required.

Right side of Challenger C-40-1 caboose

Underframe of Challenger C-40-1, showing mechanicals and brake details.

Resin Models


There's one resin model of a C-40-1/-3 in production in June 2017, with at least one more being mastered for production "soon".

WrightTrak C-40-1/-3 - $56.95


WrightTrak has for about 8 years offered a resin one-piece body kit for a C-40-1/-3 caboose.


While I've not had the time to assemble this model, I am posting these photos of the parts in the kit.


The Instructions are on a mini-CD, which is a good option to show clear photographs of the assembly process and all relevant data relating to the models.


Body

The left side of the one-piece body.

The left front corner of the one-piece body.

The right rear corner of the one-piece body.

The right side of the one-piece body.

The roof is cast resin

Tichy supplied the brake components for the model


A large sheet of custom photo etchings covers the end railings, metal roofwalks, steps, details of the door and brake parts.

Here's the two sheets of cast resin parts, the smokejack (only 1) and one of the two cupola's included in the kit.

Not shown are the pair of Tichy plain bearing leaf-spring trucks and wheels included in the kit, which are actually my preferred truck for cabooses.

The WrightTrak model is a nice kit to settle into build on a cold winter night. - Unfortunately I've not had the chance to build this model.

Bonanza Models C-40-1 - 3d Printed at Shapeways - $58 Shell only


Left side of Bonanza Models C-40-1

This summer Bonanza Models C-40-1/-3 released a 3d printed one-piece caboose body on Shapeways.  I wanted to see how far 3d printing of this style of model has come, so I ordered one.  The model's designed to use Athearn underframe and components, which must be supplied by the modeler.  The roofwalks and tool box are printed inside of the main body.

Generally the model looks very nice, with fine rivet detailing which is correct for SP's early steel cabooses.  There are some slight "ghosting" of the rivets across the carside, however this is mostly cosmetic, and will be hidden with a light coat or two of paint.

Tool box and broken roofwalks inside the 3d printed body.

I was a little disturbed that the model was damaged before shipment and several parts of the walkway were missing.  After discussing it with Shapeways and the owner of Bonanza, I was more or less left on my own to finish the model.

Support material marring on the cupola and short end of the carbody

Detailed view of the pre-sanded short end. - All the rivet detail's gone or will have to be sanded off.


The other damage to the details from the printing process Shapeways basically said, "Too bad, it's how we have to make it."  So it will probably take me several hours to finish sanding down the support points and replace all the rivet detail with Archer Rivets.'

Sanded end, there's still some pock-marks which will have to be either hidden later as dents or other damage/weathering.

The roof and cupola cleaned up fairly well, most of this part of the roof will be hidden by the walkways.

I spent some time sanding on the cupola, roof, and end to get the model cleaned up somewhat.

In Conclusion


I've not finished building up the Bonanza Model or the WrightTrak models yet.  When I do, I'll do a full blog post on what it takes to build.  In general I'd probably go with the WrightTrak model, as it has all the parts and costs about the same as the Bonanza model.


I'm interested to see what model comes from the other resin producer when they release their model.  Probably the fastest way to get an SP steel caboose on the rails is still to buy a Balboa ($75) or PSC ($150-ish) brass model and paint/decal it yourself (or have a friend do it).

Jason Hill

Related Blog Posts:


SP Cabooses Part 1 - Ex-Coaches

SP Cabooses Part 2 - Wooden Cabooses

SP Cabooses Part 4 - Boxcar Conversions

Modeling SP's Small Road Switchers (Part 1) - Small Steam Engines