
The PFE in the early 1950s started to expand their new car purchases into their use of sliding plug-door types for a better door seal and a larger door opening than the old 4-foot swinging plug-doors on the classic refrigerator cars. The new sliding plug-doors first showed up on the PFE's R-40-26 class of 2000 cars, numbered 8001 to 10000. Accurail released a model for an All-Steel Reefer #8500-series (Accurail kit #8504 and 85049 -3/pkg) of lettered for this class around 2012. I picked up one of these factory decorated models around 2018.
 |
| Basic assembly and kitbashing completed on Accurail's R-40-26 as PFE 9785. |
Tony Thompson wrote two articles on these cars over the last 10 years since 2012, (Kitbashing a PFE R-40-26) and (Kitbashing a PFE R-40-26: Update 2) by Tony Thompson. It is interesting how Accurail's model of the R-40-26 is actually a model of the Fruit Growers Express version of the car, but PFE's mechanical department got along very well with FGE's, resulting in designs somewhat "crossing over" between the two companies. Obviously PFE did make some minor changes and had their standard fittings applied instead of the customer specific appliances of FGE.
Thompson makes a comment that in 2012 other modelers who had checked the PFE R-40-26 against the color chips provided in Harley & Thompson's PFE book, didn't match. Because the model I bought is about 6 years newer, it seems that Accurail changed their color and fixed that issue. I have checked the Accurail model against my copy of SP Freight Car Painting and Lettering Guide by Harley and Thompson and the color now matches fine for the PFE "Daylight Orange" color.
One minor change that Thompson notes and shows in his blog post with a prototype photo is that the R-40-26s used a pattern of alternating center rivets at the vertical panel joints, while the Accurail car is only one one line of rivets at the sheet joints. This would require adding Archer Rivet decals and possibly repainting the car, which is the route Thompson suggests for a most accurate model. I don't think I'll take my kitbash that far, but I do want to add the more noticeable features, such as the circulating fans in the lower left carsides and removing the poling pockets.
What's in the Kit
 |
| Parts and sprues laid out for Accurail's R-40-26 kit. |
Like most Accurail kits, they are very much a 'shake-the-box' type of kit. The body is missing the ends, which need to be cut from their sprue and attached. The car-end sprue also has the brake platform and vertical hand-brake chain, rod, and clevis between the two ends. The coupler draftgear covers now have a screw hole molded into them, which is nice along with some parts for the AB brake system. There's also now a sprue with the brake rigging, brake cylinder, and stirrup steps to supply the rest of the parts. The brake wheel and flat steel weight were in the box and I didn't get them into this photo.
Interior Body Core!
 |
| Interior "Core" to which sides and ends are attached |
When I turned the body inverted, I noticed that the car is assembled around a 4-slide "core" design concept. Normally we've been seeing this style of construction on bigger passenger cars, such as the Walthers HW passenger cars that I've shown in such blog articles as Kitbashing a 16-Section Tourist Sleeper. I decided to pop the sides off to do the side-sill notching that is mentioned in Tony Thompson's blog post about these models from 10 years ago.
 |
| Accurail R-40-26 disassembled with sides removed from core |
Here's the car with the sides and core disassembled. By this point I'd tapped the holes in the underframe and attached the trucks and mounted whisker-scale head Kadee couplers to the car.
Side Modifications
 |
| Interior of sidesills marked for cutting. |
The sidesills of the PFE's R-40-26s were notched, thankfully Accurail molded in the maximum notching which cars could have. The R-40-26 didn't have full notching, but it was close. I used a Sharpie black marker to indicate where I needed to cut the side sills. The only special locations were at the right end of the door's lower track outboard to the next molded notch and from the T in "LT WT" inboard to the next molded notch below the pre-printed reporting marks. Note: The extra small black mark to the left, under the second C in "Pacific" is a mistake and I didn't cut there.
 |
| Modifying sills and cutting notches. |
The lack of notching between the left bolster and the reporting marks needs to be extended downward with a plate that held the axle drive belt to operate the circulating fan, which should be in the lower carside between the bolster and the capacity data, below the "FANS" and "STAGE ICING" stencils to the left of the road number. It seems I'll have to go find some detail parts to model the fan and belt drive.
Basic Test Assembly
 |
| Underframe test assembled with trucks and couplers installed |
I did glue the sides to the core, along with the two ends with ACC/CA glue. I had to be careful during this time that the glue didn't squeeze out and also glue the underframe in until the glue dried.
 |
| Right side test assembled |
The SP Medallion is always to the B-end by this era of paint scheme on the PFE cars. This was to equalize the chances of exposure of the SP and UP heralds. Originally SP's was always closest to the doors, and would be covered in all the publicity shots showing the car being loaded with food products! The concerns were addressed and this reversal of the heralds on the left side was the result.
 |
| Left side test assembled |
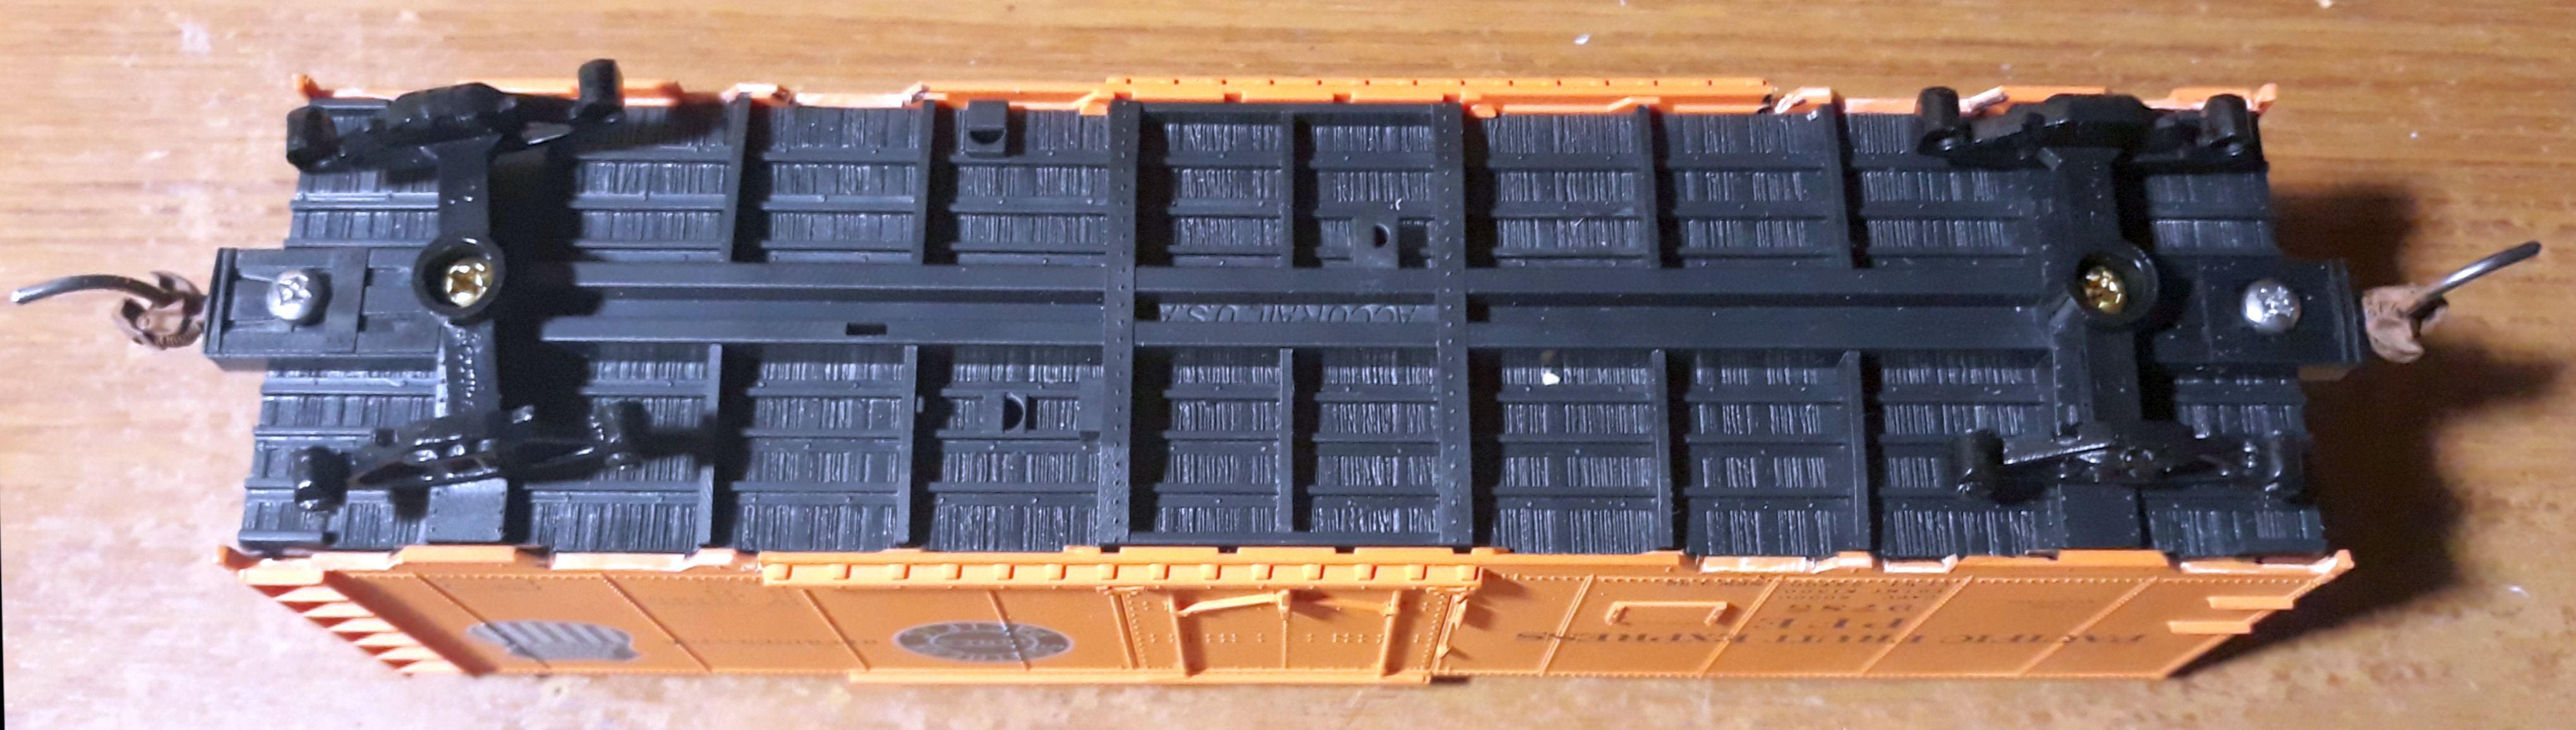
Underframe Assembly
 |
| Completed underframe with all brake parts and brake rigging installed. |
The underframe is pretty much what I'd expect from an Accurail car. This looks like a retooled version of their standard steel boxcar underframe, with a couple new slots cut for the dead lever of the brake rigging in the centersill. It's good to see some improvements in the tooling over the last 25 years since my last experience with Accurail's boxcars of the 1995 era.
In Closing
 |
| Right Side PFE 9785 |
The next steps will be to finish up the circulating fans and belt drives, and look closer at the heralds, which seem a little off to my eye. Thompson's article from 2012 suggests new decals and with the body work, just repainting the whole car. I'm going to see if I can do it without doing a complete repaint.
 |
| Left side PFE 9785 |
I'm also planning to install the steps, but not until the rest of the body work is done. I still need to remove the poling pockets as well. Modeling Accurail R-40-26 PFE 9785 (Part 2) - Minor Modifications
Jason Hill
Related Articles:
Kitbashing a PFE R-40-26, Kitbashing a PFE R-40-26: Update, and Kitbashing a PFE R-40-26: Update 2 by Tony Thompson
Kitbashing a 16-Section Tourist Sleeper - Another series of kits using the 'interior body core' concept of construction
Jawbone Freight Roster - Update 2022-06-26 - Current list of freight car projects I'm working on for my Jawbone Branch layout.
No comments:
Post a Comment
Please identify yourself at the end of your message. Please keep comments relevant to the post or questions to me directly.
All comments are moderated and must be approved, so give me a bit of time to approve them.
No random solicitation in comments. Spamming and phishing comments will be deleted or not allowed to post.