
 |
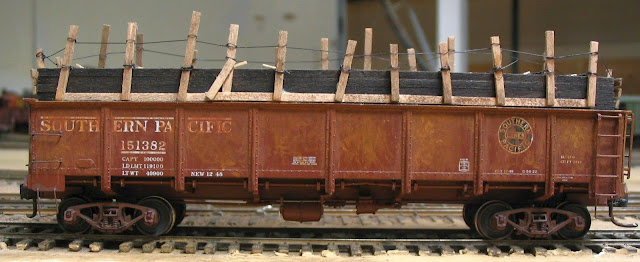
| A sideview showing the crazy arrangement of bracing dunnage that was used on the prototype for the load above the sides of the gondola. |
This post is going to be a modeling flashback to 2004, when I built this load for the pool of Red Caboose GS gondolas. I based this load on a photo in Thompson's SP Freight Car Vol.1 of SP 151382.
Building the Load
I fabricated the main box of the load with dark stained/painted scale wood strips of appropriate size for the big bridge timbers.
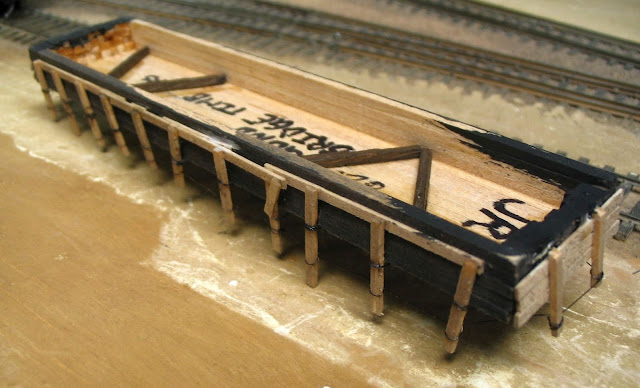 |
| Interior of the load. |
I made the sides extend one timber below the sides to help "key" it onto the body of the gondola and minimize how much material and weight I was adding to the model. The diagonal braces inside are ME stained ties that I used to keep the top layer of timbers from breaking apart.
 |
| Cross-ties fabricated using the 'twisted' fishing line with small sections of roughly 2x4 fragments. |
The side dunnage rails of 2x6 boards were probably nailed to the beams. Then the vertical posts were nailed to the longitudinal rails.
%20REV-A.jpg) |
| OwlMtModels diagram showing AAR's standard for making iron wire ties between vertical posts. |
Then iron-wire cross-ties are made following the AAR standards shown in OwlMtModels' lumber loads. The banding is made from 6-pound test fishing line, blacked with Sharpie marker. Once the cross-ties are made between posts, then the iron wire wraps around the tops of the posts are made.
Close-up of the Ends
 |
| A-end of the load. |
End bulkheads were built up with thinner planks and two vertical posts, which I cut off at the top of the gondola ends.
 |
| B-End of the load. |
This seems to be the way the prototype photo was, however, I would probably make them continuous into the inside of the ends for more support.
In Closing
The whole load at this point becomes tied together, so the posts are both more fragile and strong at the same time. After 18 years at LMRC, this load has only broken one or two post boards, which I was able to fix with another small drop of ACC/CA glue.
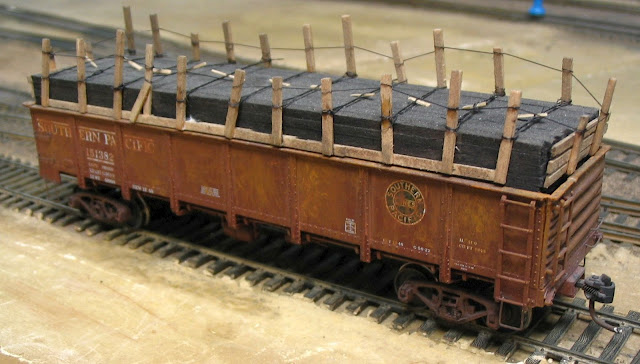 |
| Completed Bridge Timber load. |
This load has been a fun one to see around the layout since 2004. I would suggest anyone wanting to build their own to put one together. It will probably take a couple of evenings to build it and put on all the iron wire ties and be well worth the investment of time with a unique load for either through movement or local MW use to fix that short trestle that's been needing it for the last 6 months before the coming winter.
Jason Hill
Related Articles:
Open Loads (Part 1) - Building a Steel Load - Also examples of returning loads with SCOs.
Open Loads (Part 2) - Lumber in Boxcars - Open doors & removed doors
Open Loads (Part 3) - Deck Weathering - No Loads? Means modeling the deck weathering too!
No comments:
Post a Comment
Please identify yourself at the end of your message. Please keep comments relevant to the post or questions to me directly.
All comments are moderated and must be approved, so give me a bit of time to approve them.
No random solicitation in comments. Spamming and phishing comments will be deleted or not allowed to post.