
In this update post, I'm starting to do the upgrades to my fleet of Accurail Supply Boxcars, installing the new "Man-door" plugs to the cars. In this case SPMW 2681 and several other cars.
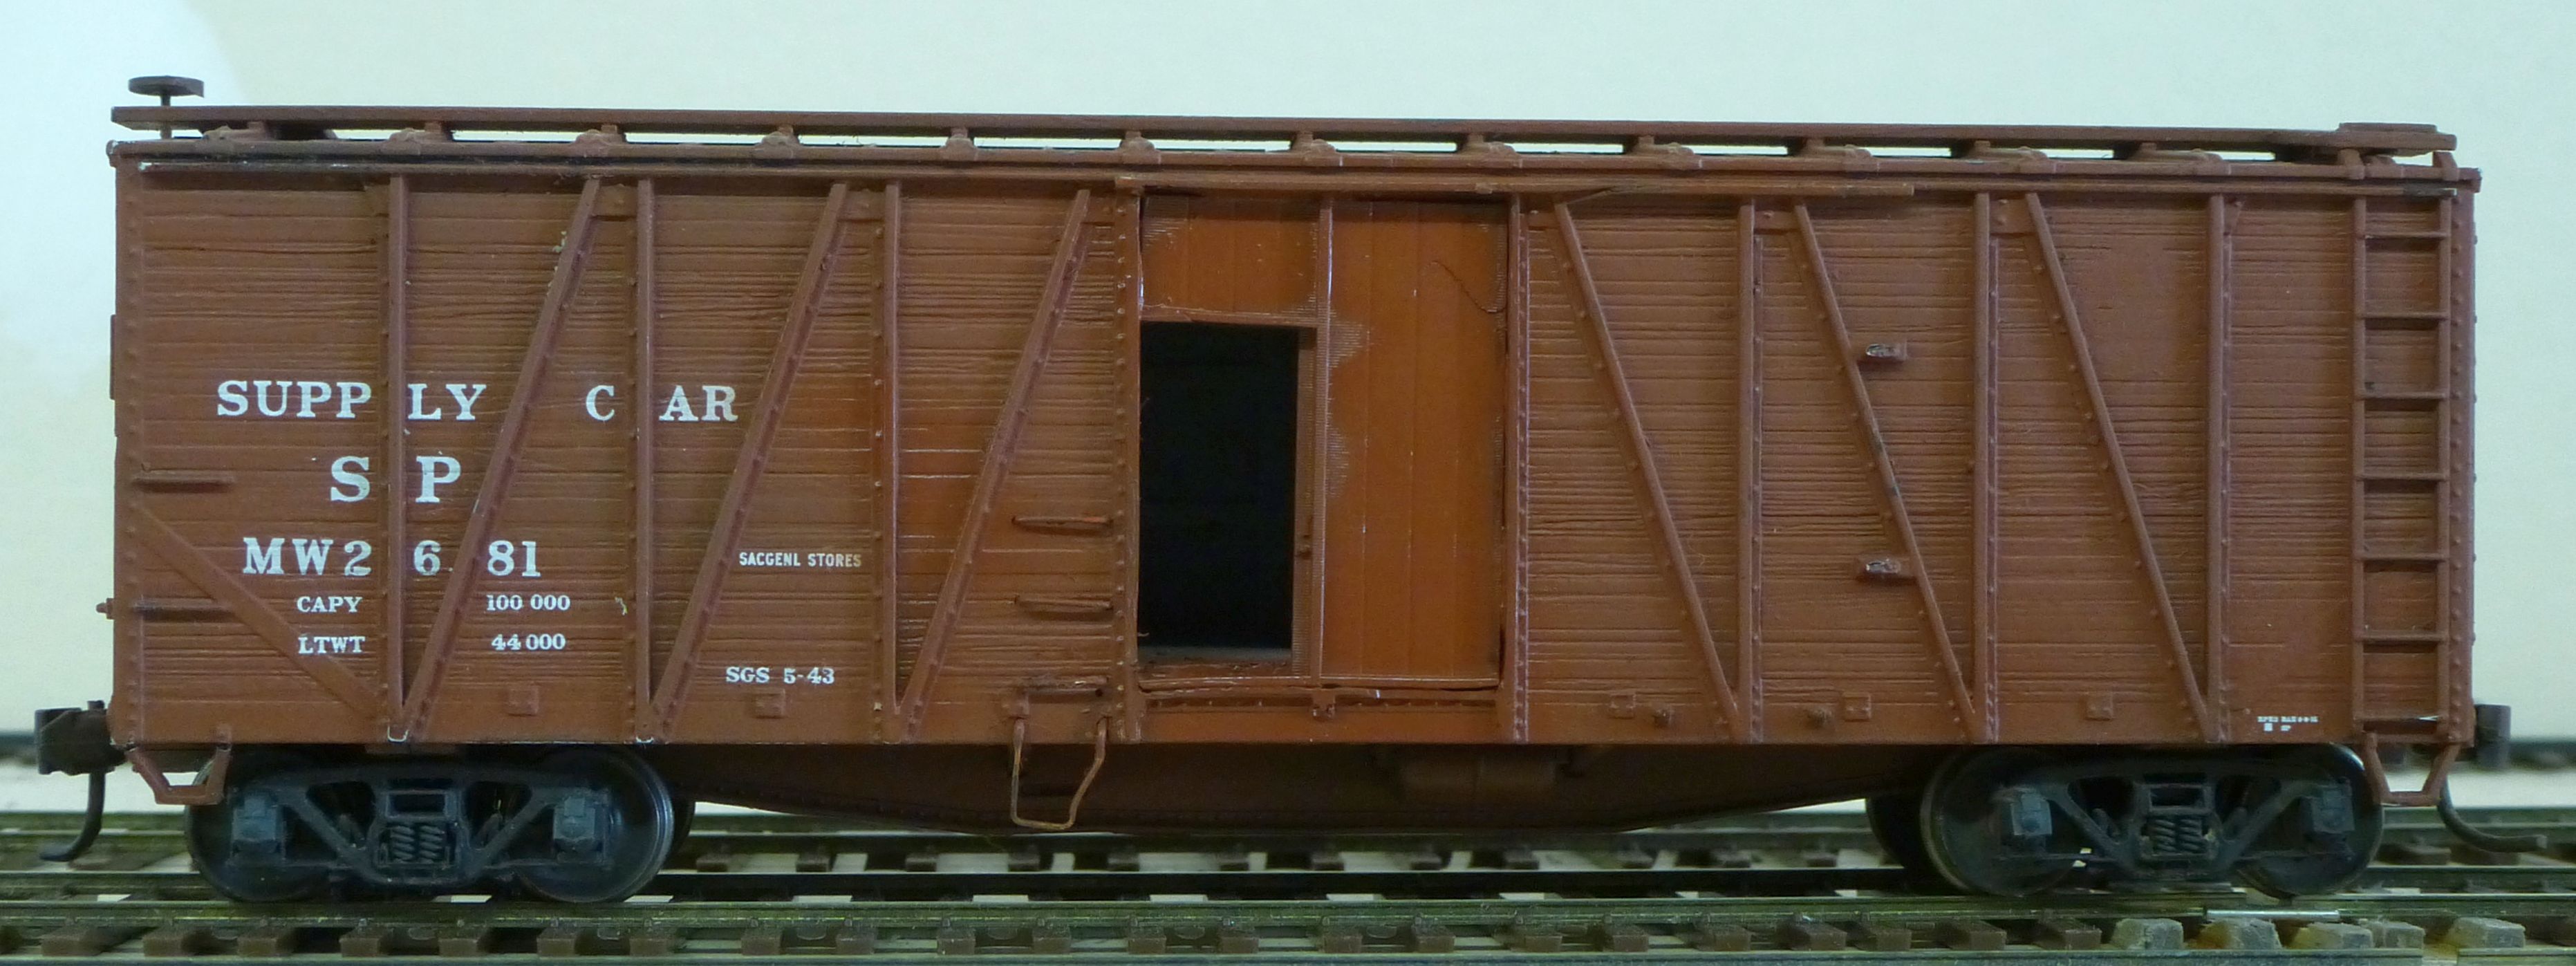 |
| SPMW 2681's open door side from new OwlMtModels 4076 door set. |
Prototype Photo
 |
| SPMW 2681 Unloading Supplies from man-door - screen shot from This Is My Railroad, Steam Versions (1946) |
This car's receiving incremental upgrades. Last time I repainted the car, then realized that the doors needed to be rebuilt. I will probably keep a couple of Supply Cars with full size 6ft doors, but several should be changed over to this small man-door version.
The white diamond warning is probably a 'flammable' placard warning. So far SPMW 2209 is one of the cars that has warnings for flammable materials. The SPMW 2681 isn't listed on the 1945 Los Angeles Supply Train consist (that we looked at from Part 7), so I will need to do cross checking what this car in the film and then decide what car will be so placarded of the cars I'm modeling.
 |
| SPMW 2209 with "Keep Lights Away" stenciling |
The white diamond warning is probably a 'flammable' placard warning. So far SPMW 2209 is one of the cars that has warnings for flammable materials. The SPMW 2681 isn't listed on the 1945 Los Angeles Supply Train consist (that we looked at from Part 7), so I will need to do cross checking what this car in the film and then decide what car will be so placarded of the cars I'm modeling.
Upgrade Parts - OMM 4077 (open and closed pair)
 |
| OwlMtModels 4077 SPMW Supply Car Man-Doors (Open & Closed). |
The replacement "man-doors" are 3d printed by OwlMtModels' 4076 (open/closed pair) and 4077 (closed pair), price TBD/pr. Contact OwlMtModels at sales(at)owlmtmodels(dot)com to order. Both open and closed versions are available. Most cars should probably be modeled with the closed-door option, as the open option would really only be seen when the cars were loading with supplies at the big General Shops or unloading at stations in Supply Train service or division point material yards.
 |
| Back side of OMM 4076 SPMW Supply Car Man-Doors (Open & Closed) set. |
The backs of the plugs are designed to catch on the interior of the carsides to provide the correct depth spacing back from the exterior of the car side. Obviously cars with the open door, should probably be fitted with some form of interior, board detail on the floor and material racks on the inside of the car's walls. I will probably go in and at least scribe the floor weight and paint it to look like wood.
Removing the Molded Door
 |
| Removing the sliding 6ft door |
I started the door upgrades by drilling around the corners of the door with a 0.093" drill in my larger pin vise,
 |
| Cutting out the door. |
Then I used a key-hole razor saw to cut between the holes.
 |
| Shaped door opening. |
Continued shaping of the opening by carving with brand new sharp no.11 X-acto blade. The door's remaining overlap of the steel body structure also needs to be carved off. I did this quickly with the No.11 blade and a couple of light passes with the file to clean it up smooth. It would have been easier to do this on cars without the grab-iron ladder already in place.
 |
| Open-door side after installation. |
Continue enlarging the opening with the No. 11 blade and flat files as needed to get a press fit of the new 3d printed OMM 4076 & 4077 doors.

I had to trim the closed man door to clear the existing wire grab-ladders on the inside. On a new car conversions, I would hold off on putting in these grab irons until after the replacement Man-Doors were in place. Thick ACC/CA glue was used to glue the Man-Door plugs in place. Small amounts of super-thin ACC/CA glue was also used to finish, and a drop of Canopy Cement was used under the bottom plate of the open door to fill a slight gap.
 |
| Closed-door side of SPMW 2681 after installation. |
The plastic corner steps took some damage during the multiple assembly cycles, removing and putting the underframe back in to support the sides, that it took to open both side doors. I will be replacing them at this point with A-line wire stirrup steps.
In Closing
 |
| SPMW 2681 reassembled and waiting for replacing of the corner stirrup steps. |
I will probably do the same upgrade to a couple more of my Supply Boxcars, but will be using the closed door option, as that's the normal way these cars would be seen in trains and around the SP system unless someone was actively loading or unloading the car.
Jason Hill
Related Articles:
Freight Car Modeling Index - overview of all my freight car modeling projects
No comments:
Post a Comment
Please identify yourself at the end of your message. Please keep comments relevant to the post or questions to me directly.
All comments are moderated and must be approved, so give me a bit of time to approve them.
No random solicitation in comments. Spamming and phishing comments will be deleted or not allowed to post.